For the beekeeper, honey is probably the most profitable part of the harvest but it is not the only one. The next most important crop, for most, is beeswax, of which there are three sources:
- Cappings from your honey extraction;
- Old combs;
- Scrapings from hive.
Beeswax has a thousand and one cosmetic and domestic uses but unless a good price can be assured the most fundamental use for the beeswax crop is as new foundation.
What is Rendering?
Before the beekeeper can embark on any wax venture he/she must render the wax. Rendering beeswax means to melt it and separate it from physical impurities such as propolis, mouldy pollen, larval moults and chalkbrood mummies. Once rendered, spores of disease-causing organisms such as Nosema and American Foul Brood are harmlessly encapsulated within the body of the wax. Eggs of things like wax moth are killed by the heat.

What temperature?
To filter out the rubbish, the wax must first be melted so that it is runny enough to be strained. Beeswax melts at 62ºC but this temperature is not hot enough for it to run through a cloth or other strainer – it will just cool too quickly and clog up before you can say knife. If melted in water or in some kind of a water bath then the heat cannot rise to instantly damaging temperatures. In fact you can take it all the way up to close to the boiling point of water without damage then it will run through your cloth no problem. However it is damaged by prolonged or excessive heat and will discolour to a murky olive – so don’t leave it boiling for ages and ages. Oh and by the way, it will ignite if presented with a naked flame – so don’t do that either.
Once melted, the wax can be separated from the aforementioned detritus by some sort of straining method.
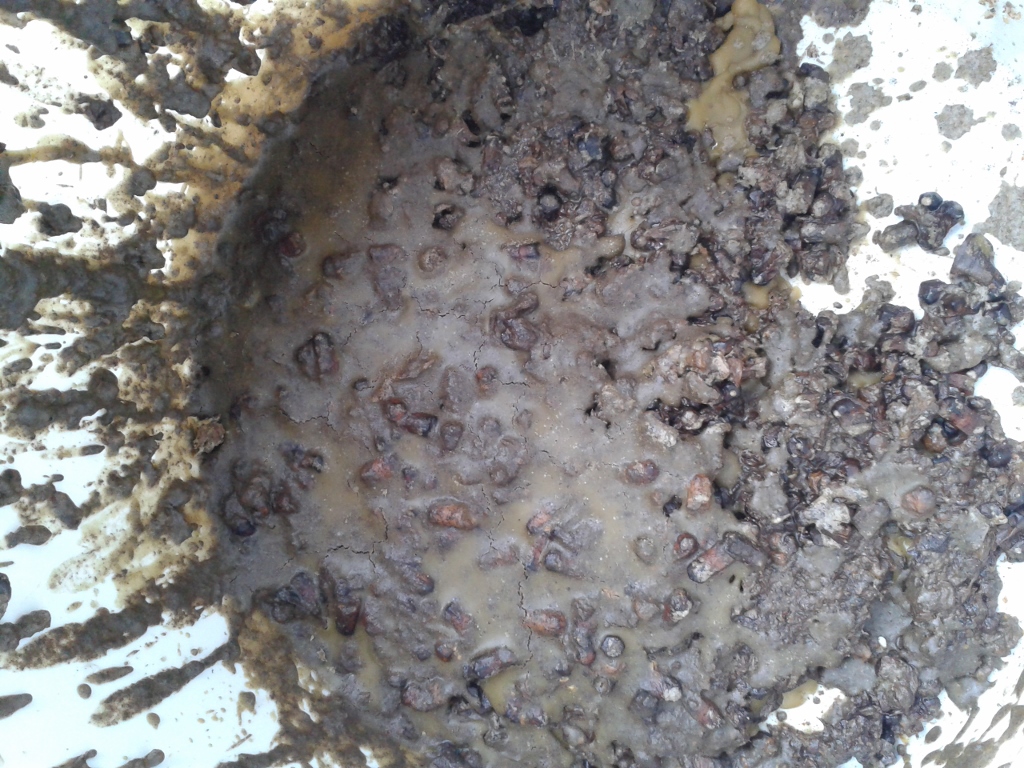
The horrible stuff left in the strainer – that dark brown mess of dead larvae, pupal shirts (yes – ‘shirts’) and old chalk brood etc is called ‘slumgum’. Slumgum is a disgusting mess but great for lighting fires or priming swarm catchers: just slap it around the insides of your bait hives – while still warm of course.
How pure does it need to be?
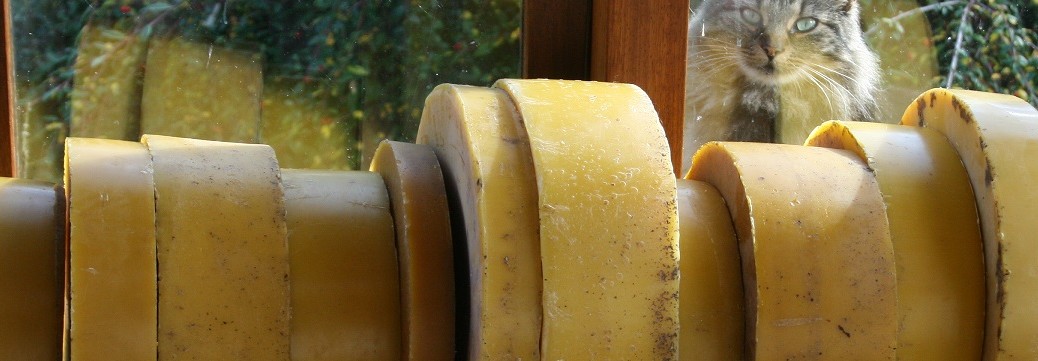
Rendering beeswax is the first step in the purification process. The cakes of wax from this first straining are only partially clean – see header photo above – but beekeeping equipment suppliers will accept this standard of wax in exchange for foundation.
I should add that you won’t get much wax like this from combs as grotty as those above. Old comb is a great firelighter and that’s what it’s best used for but unless you want a chimney fire make sure your flue is clean because it burns ferociously. For the finest purest beeswax, stick to the burr or brace comb you have scraped off the hives during the summer or better still the cappings from your extraction.
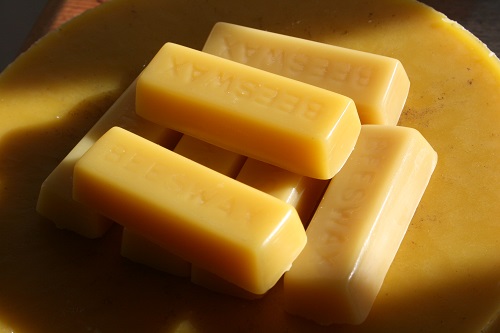
To get really pure beeswax is a two step process. Render it first to get rid of the big rubbish then if you want it pure enough for soap or cosmetics – break it up, melt again and strain through a very fine cloth.
The Process
Here are some of the many ways of rendering beeswax for foundation where priorities are sterilisation and economy:
- One of the simplest rendering methods must be Witherell’s boil-up-and-strain method. The combs are placed in cold water and brought to the boil, once melted the whole lot is strained through a 3mm mesh. When the ‘liquor’ cools the wax will set in a slab on top of the water.
- A variation of this is Witherell’s submerged sack, or boil-in-the-bag, method. Here the combs are tied up in a sack and plunged into a vessel of water which is then brought slowly to the boil. The sack is given the odd poke with a stick to let the wax float free.
- Witherell’s third method involves wrapping an entire brood box, full of old combs in their frames, in 3mm mesh then plunging the whole lot into a vat of water and soaking from ‘several minutes to several hours’. The water is then brought to a slow boil and allowed to cool so that the wax hardens on the surface of the water. That sounds impractical to me – don’t you think?
- A simple one, for small-scale bits and pieces, is the water bath method (Williams). The wax cappings etc wrapped in a pair of old tights or similar are placed in a jug which is in turn placed in pan of water. The water is brought slowly to a gentle boil and when the wax is melted, the tights (containing the debris) can be removed and the clean wax can be poured into a suitable mould for use later.
- The solar extractor is an insulated wooden box with a double glazed glass panel for a lid. Inside there is a metal tray emptying into a removable container. The old combs are placed inside and the whole box is angled to catch as much sun as possible. If the combs are wrapped in muslin then the wax will come out ready filtered. According to Hooper the sun will produce temps of 71-88ºC, however he is talking about the broiling south east of England – temperatures in Ireland could be expected to be a bit lower. The heat produced will also sterilise frames of Nosema spores and wax moth eggs. The solar extractor only extracts 20-50% of wax (Witherell) but it has the advantage of low operating costs.
- A steam wax extractor is a bit like vegetable steamer in that there is a lower vessel containing the water above which, is a steamer containing the vegetables or in this case the wax. When the water is heated to boiling, the steam is forced up into the steamer, the wax is melted and it is run off a side vent into a suitable container. Steam wax extractors are not cheap – but they do have the advantage that they can extract almost all useable wax.
- A variation on the steam wax extractor is the steam press. This is like a steam extractor in that there is a lower water container but the upper chamber consists of a press. The combs are wrapped in the filter cloth of choice and placed in the press then the water is brought up to boiling. As the steam rises up and starts to melt the wax, downward pressure can be applied to the bag of combs to force the wax out of the slumgum.
- Mr.R.O.B.Manley had one of the above but was rather disenchanted with it so he used it as a press only. He would just toss all the bits of old comb into the 20 gallon boiler he used for syrup along with gallons of rainwater. As it melted he would scoop out basins full of ‘mush’ into a sack. The sack was then put into the press under a specially made, round, flat, disk and pressure applied by means of “the heavy lathe cut screw and its spider”. The wax was run out into a large tank of rainwater “where it would solidify in all sorts of queer shapes”.
- Witherell mentions a variation of the steam extractor that instead of pressing the slumgum, spins it to extract the remaining wax centrifugally – this is the Heated Centrifuge Method. It finds little favour with Witherell though; he describes it as messy and cumbersome and more for use by professional rendering plants. Dear oh dear.
The Kochstar Melter
The ‘New’ Kochstar Wax Melter (as described in the Thorne Catalogue) is a thermostatically controlled tank to heat the wax to between 30 and 100ºC. It comes equipped with two taps, one near the bottom to run the water out and another about 4″ up to run the wax from off the top of the water because as you know – like butter, beeswax floats on water.
I bought one of these and I remain disenchanted with it. Thorne’s have instructions on their website and I’ve followed them to the letter without success. The taps have a very narrow bore so they are easily blocked by even one little cocoon and if you do want to run wax off through the top tap you will need to get it very hot or it sets in the tap and blocks it. I made a lagging jacket for it which helped a bit but not much.
My Process
Nowadays I put a trivet into the bottom of my Kochstar boiler then drape a large cloth (old net curtains from charity shops are great) with 2-3mm mesh over the top which I the fill with the various horrible bits of old wax followed by a gallon or so of rainwater and press the lid down with the edges of the cloth still hanging out over the edges. The trivet is necessary or the cloth will sink to the bottom; the element heats the bottom of the tank to a very fierce heat and if the cloth is synthetic it will stick and then it will melt and then it will burn despite the water – much like an overheated stew. This is the bitter voice of experience of both those things.
Once the beeswax is well-melted you can lift the cloth up and hold it aloft to drain a bit then slap it onto a cold concrete floor – mind your shoes – where the slumgum will solidify and can be peeled away from the cloth in the morning.
Don’t do this in the kitchen!
Don’t overheat beeswax or it will turn nasty shade of olive.
Pour the beeswax and the water into a plastic bucket, put a lid on it and let it cool. The wax will rise to the surface and set in a cake. Once it is completely cold you can tip it out. Scrape the crud off its bottom and it should look like the ones in the header photo above. That’s Millie in the background.
Further info:
Click here for a simple way to make beeswax wraps
Click here for beeswax lipbalm recipe
Click here for beeswax handcream recipe
Click here for beeswax furniture polish recipe
Click here for beeswax soap recipe
Click here for beeswax candlemaking
Click here for home dentistry with beeswax
Sources
Hooper,T. Guide to Bees and Honey. Blandford, London. 1991.
Manley,R.O.B. Honey Farming. Faber and Faber. London. 1946.
Witherell,P.C. Other Products of the Hive. In The Hive and the Honey Bee. Ed. Dadant & Sons. Dadant & Sons. Hamilton. Illinois. USA.
Williams,R. Beeswax for Show. In Bees, Hives and Honey – The Beekeeper’s Companion. Ed. Eddie O’Sulllivan. FIBKA. Ireland. 2000.
http://www.thorne.co.uk
Copyright © Beespoke.info, 2014. All Rights Reserved.
Hello,
I live in county Wicklow and want to buy beeswax locally.
Any ideas please?
Lovely website.
Pyper
Hi Jane,
Appreciate if you could tell me whether there is a difference in beeswax thats fine strained in the above mentioned process vs the USP, BP grade or pure refined beeswax? Some blogs are using strained natural beeswax for making DIY cosmetics like lip balm while some are advising only to use 100% pure beeswax from beeswax refinaries… is there a purity difference between them? confused and would love some advise pls. Thank you!
That’s a very interesting question and I don’t think I’m qualified to answer it.
I mean how pure do you want it and who do you trust – your local beekeeper or that great big processor?
Perhaps the magic is in the impurities like the pollen and the propolis, the lovely natural golden colour and the ‘beeness’ that the big processors remove.
Thank you for your thought-provoking question!
Hi Jane,
A very happy new year to you and yours.
In Witherell’s boil up and strain method. Is it necessary to use a stainless steel pot or can any old pot be used?
Tied in a sack method. What type of sack do you mean? Will a pair of tights or fine mesh muslin cloth be necessary.
Straining through a 3mm mesh. Will muslin cloth do for this?
What type of container should it be strained into and should water be put in the container first?
In Williams bath method. Should water be put into the jug with the wax cappings?
Hello John,
They say to use stainless steel because some metals can react with the beeswax and it will darken as a result. I’ve only ever used stainless steel so I can’t give you a first-hand reply to that one!
As for cleaning the wax – it’s best to consider this as a two stage process.
The first stage is to strain out large debris such as larval cocoons, chalkbrood, dead bees etc and in this case a 2-3mm mesh is best – fine mesh will just clog up. All your old combs, wax scrapings etc are melted in water and the whole lot is strained, the wax then sets in a cake on top of the water. As it cools, more impurities will drop through the wax and can be scraped off the bottom of the cake when it has set. Any sort of container which will hold boiling water without deforming can be used – I use 5 or 10 litre plastic mayonnaise buckets. Once cooled just take them outside, turn them upside down and shake them a bit – can be messy.
Tying it all up in a sack is just another way of doing this ie when it’s all melted you haul the sack out containing all the debris and leave the beeswax behind.
The second stage is where you re-melt your cakes of partially cleaned beeswax and fine-strain it prior to candle making or casting some moulds etc where you want the wax to be spotlessly clean. Here you melt the beeswax on its own, in a double saucepan – put ‘bain marie’ into google to see a picture. Once melted, old tights or muslin would be the perfect straining material.
The Williams method is a method which attempts to roll these two stages into one – I think only practical for very small amounts of wax. No, you wouldn’t put water into the jug. It’s like the sack method in miniature – you put the beeswax cappings into the jug and put the jug into a pan of boiling water.
Hope this clarifies things!
Thanks Jane for such a detailed reply, much appreciated.
Regards
John