Grafting is often seen as highly technical and an unattainable skill. It shouldn’t be though – because it isn’t – it’s just practice and knack.
After all, the aim is simple enough: – to transfer a young larva from one cell to another. How difficult can it be?
To maximise success you need to sit down and think for a bit though. Consider how to choose your larvae, which grafting tool to use and how to set up your rearer colony. Then get stuck in – what’s to lose?
The Larvae
Worker larvae and larvae destined to be queens both receive the same food until they are two days old. After that, queen larvae receive the much richer ‘royal jelly’ while the worker larvae are fed bee milk until they pupate.
Therefore, the larvae you use for grafting should be less than two days old – that’s five days in total, 3 as an egg and 2 as larvae.
When the eggs first hatch, the larvae are so tiny and transparent they are difficult to see at all. They are also very scantly supplied with brood food. These larvae are too small for the following two reasons:
- They are physically too delicate – you will almost certainly damage them with your grafting tool;
- The lack of brood food surrounding these tiniest larvae means they are also very much prone to dehydration.
Most beekeepers are likely to be limited by their eyesight anyway so aim to get them as small as is possible. If however, you are young and your eyes are very good then I would suggest that you choose them a bit bigger than that – be pragmatic and get them as small as is sensible.
Try also to get your larvae all the same age.
Look at a newspaper and find a lower case ‘c’. Depending on your newspaper, this is approaching the biggest larvae you can successfully use.
Choice of Queen
Ideally you will have records of at least a year so that you can properly assess your queen mother. If you don’t have records – be careful or you could be sowing dragons teeth; once the genie is out of the bottle…
Click here for How to Assess your Bees and a downloadable Colony Assessment Sheet.
Additionally, your queen should be laying like mad. If she isn’t you will struggle to find sufficient larvae of the right age on one frame. Choose a frame where there is a good sized patch of larvae with a range of ages from eggs all the way up but where you can see plenty of the smaller ones.
Find a row of larvae of the right age then draw a sharp knife across the cell walls so you can part the comb allowing better access.
Scoop up each larva as if it was a sleepy kitten.
Grafting Tools
There are a number of tools available from stainless steel to humble plastic and available at a predictable range of prices. This is one area when the cheapest is actually the best.
The Chinese grafting tool is made of plastic tipped with a delicate sliver of something fine and flexible with a rounded tip – like a fairy’s fingernail. At the other end is a spring loaded plunger. To use it, you gently slide the edge of the tip under the larva – approaching it from behind – and, with a slight sideways scooping motion, lift it free. If you find the larva tends to stick to the side of the cell, try licking the the sliver tip before each graft.
To unload it you merely touch the tip of the tool to the bottom or your target cup, so it bends slightly and depress the plunger. This causes a plastic nudger to slide down the length of the sliver and push the little larva off the end. How difficult was that?
By the way, if this letter c is your larva – the back is to the left.
If you can’t get on with a Chinese grafting tool – you have only wasted a couple of euro/quid/dollars etc.
Very expensive stainless steel grafting tools like the things dentists prod and scratch at your teeth with are are also available. I found them too rigid and clumsy – you know how it feels to get a dig from one of them things!
However, some people like them and you might be one of them.
But you can use anything that works for you – even a cocktail stick can be pressed into service if you chew the very tip of it to soften it then bend it over at an angle to suit both you and your larvae.
Cell cups
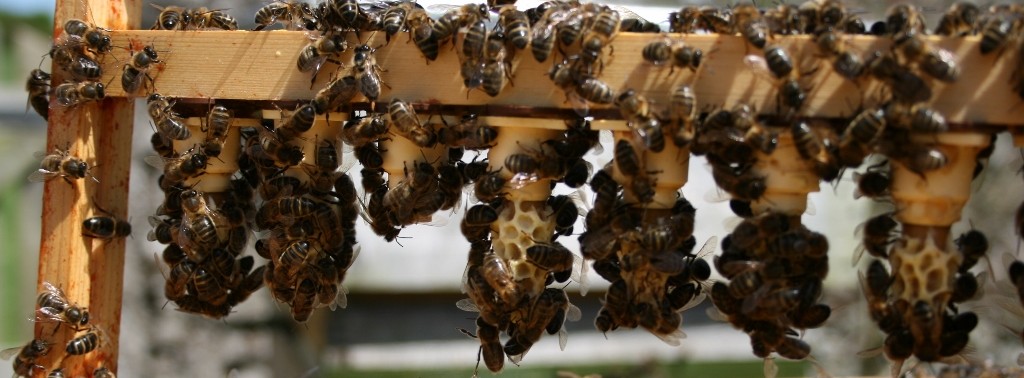
I use plastic cups from a Cup Kit attached to two bars in a bar frame (see header photo). The bars swivel so I can lay the frame flat and also have the cups facing up at me.
The frame should be put into the rearer colony the day before you are due to graft so that it gets to smell a bit beeish.
A standard deep National frame can be fitted with two bars and each bar can hold about 10 cups. Don’t overload your rearer colony; you might get more cells accepted but they will probably be poor quality.
Wet grafting versus Dry grafting
If you use a fine paintbrush – the type Leonardo da Vinci used to paint the eyelashes on Monalisa – you can put a miniscule drop of water (no larger than the larva) into the base of each cup. Then when you come along with your little larva, the surface tension of the water will make it easier for you push it off with the nudger. The size of larvae you are working with are very prone to dehydration so the water will help prevent that from happening. By the way, if you are connected to main drainage it might be better to use rainwater than the chlorinated stuff from the tap.
You can graft dry but I find it much more difficult – perhaps it is something to work towards. If you are working in the field however – dry grafting may be what you are stuck with. It’s just another knack. Keep out of the sun – strong direct sunlight will kill your larvae.
Some people mix up royal jelly with a bit of water and dab a little of this into the cells. The chances are that the more steps and complexity you add into the process, the more places there are to go wrong.
Queen Rearing Colony
Once this is done – you are ready to place them into your rearer colony. There are many ways of setting up a queen rearing colony. One of the best is the Cloake board system which allows you to use a queen right colony. Queen right colonies are more balanced and will raise better cells. Click here for How to Set up and Use the Cloake board system.
Click here for How to Improve Your Bees
Click here for a Queen Rearing Timeline
Click here for How to set up a Jenter Kit
Click here for How to set up an Apidea
Copyright © Beespoke.info, 2015. All Rights Reserved.
Why is it so difficult to find grafting frames for sale? Nearly all beekeeping websites refer to them, but I cannot find the for sale anywhere.
It’s relatively easy to adapt a standard brood frame to accept grafts or Jenter cups.
If you are grafting into CupKit or Nicot cups it’s just a case of equipping a standard frame with one or two rails wooden rails and attaching the plastic cell bar blocks and caps. You can get these and the cups from Thornes. Here: https://www.thorne.co.uk/queen/queen-rearing?product_id=6776 and here: https://www.thorne.co.uk/queen/queen-rearing?product_id=4442
Or if you are using a Jenter kit you can get these metal bars from Thornes here: https://www.thorne.co.uk/queen/queen-rearing?product_id=4458 then it’s just a case of cutting a couple of slots in a standard brood frame.
Hope this helps.