Here’s how to set up your Jenter kit. It’s how I did mine and that’s now working well.
By the way, be warned – the bees won’t like it when it’s new and the queen will be reluctant to lay into it. So get it set up and into a strong colony to get it drawn out and smelling beeish before you trot the queen into it.
There are basically three parts to the system – the frame, the plugs and the bar frame.
The Frame
Here’s some photo’s to show how to set up the frame – click each of them for a close-up.
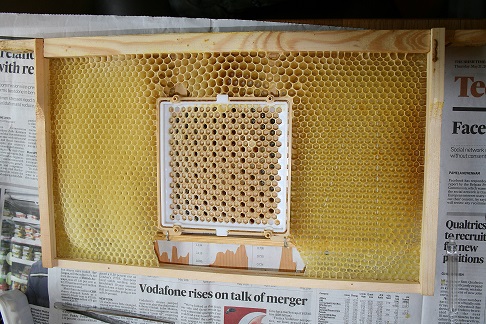
First remove the wedge from the frame. Drill a small hole into each of the little feet at the bottom of the legs and screw them, centre frame, into the recess thus:
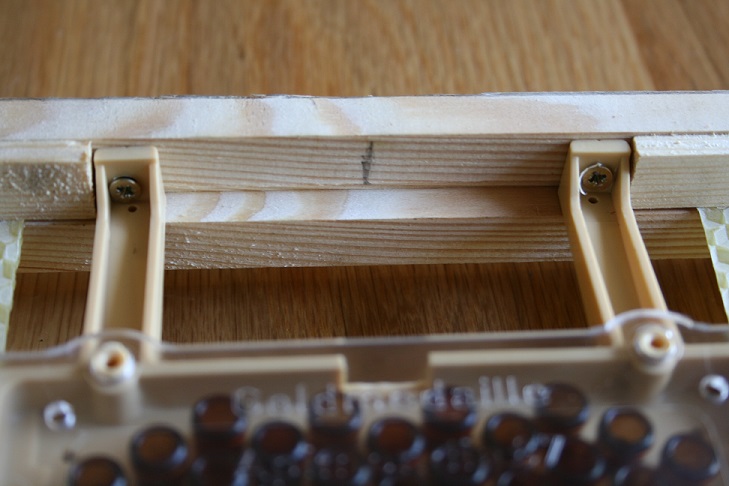
If you then trim a bottom bar to size you can pin it crosswise to the side bars and wire the plug box (note plugs in frame) to it like this:
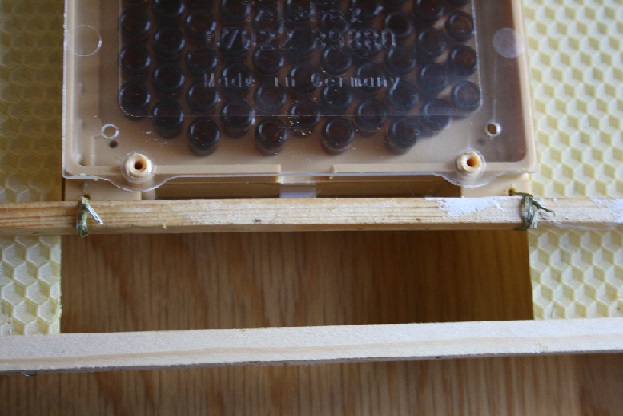
Get a sheet of foundation and cut a couple of pieces to fit either side. Cut a couple of lengths of the wedge to hold it in place:
You now need to get the bees to draw this so put it into a strong colony. Leave the front plate off so the bees have unrestricted access to the face of the cell box. If need be add a feeder so what you are aiming for is this:
The Plugs
Here’s a photo of the plug holders – yellow. The plug-housing and plugs themselves are the brown bits:
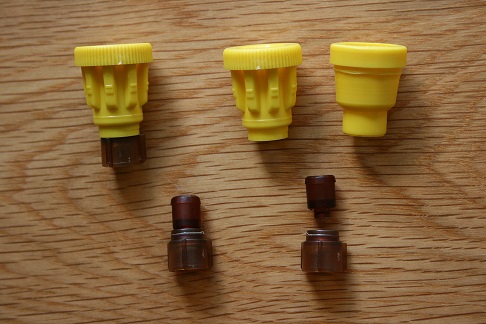
There are two types of yellow plug holders – ribbed and smooth. Given the choice – go for the ribbed holders. The bees glue the smooth holders to the frame and you’ll have to prise them loose with your hive tool. The ribbed holders come out quite easily which is important when you are stressed while trying to be calm and gentle.
As for the plugs themselves – they’re self explanatory really – they’re the smaller brown parts and they fit into the back of the cell box. When you have got them laid up (see photo below) – the plug is removed from the frame and pushed into the larger winged housing and then the whole thing is pushed into the cell holder of your choice. See photo above.
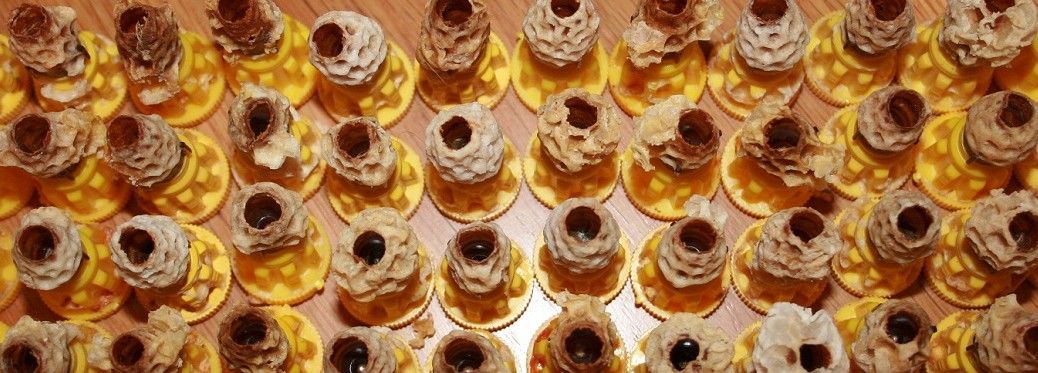
Below is a photo of some cells in the Jenter cell box containing day-old larvae – click it for a close up:

These larvae are very well provisioned and the light reflecting off the brood food is making this photo a bit misleading. The best cell to look at is the second cell down on the left hand side – the one with the dark base. You can see the little tiny c-shaped larva quite clearly in the very centre of the cell in the midst of the gleaming circle of royal jelly.
This where a Jenter or CupKit has the edge on grafting – I defy anyone to lift larvae this small with the grafting tool of their choice and transfer it to a grafting frame without damaging it.
Bar Frame
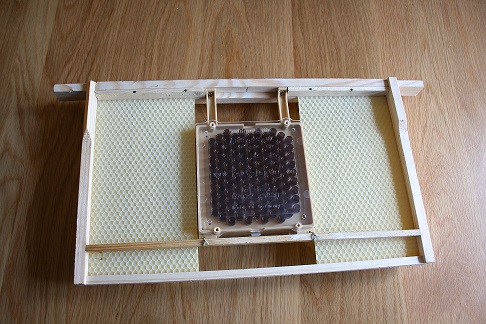
This is a photo of a frame fitted with two slightly wonky, metal bars ready to receive twenty laid up Jenter plugs. It can then go into your cell-rearer colony. All you need to do is cut two slots to house the metal.
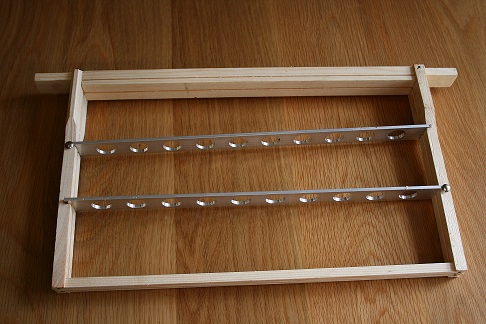
If like me you cack-handedly cut your slots a bit on the generous side a couple of strategically placed upholstery pins or matchsticks can sort it out.
After a further 10/11 days in your cell raiser colony, the cells will be ready to go into your Apideas thus:
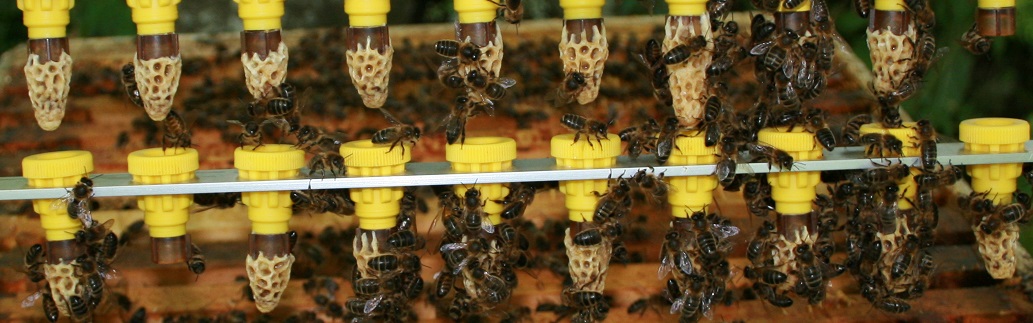
By the way, if you think you may need to fit roller cages make sure you leave enough room between the two bars.
Now all that remains is to learn how to use it!
Click here for How to put your Jenter Kit into use
Click here for Cloake Board method of Queen Rearing
Click here for How to Set up an Apidea
Click here for a Queen Rearing Timeline
Click here to listen to Piping Queens
Copyright © Beespoke.info, 2015. All Rights Reserved.
thanks for your help
Got my Jenter Kit yesterday. How come I only got one slightly wonky metal bar and you have two slightly wonky metal bars?
Hello Liam!
I got two wonky bars because I bought extra wonky bars.
Get your wonky bars here: https://www.thorne.co.uk/index.php?route=product/product&filter_name=jenter&product_id=4458