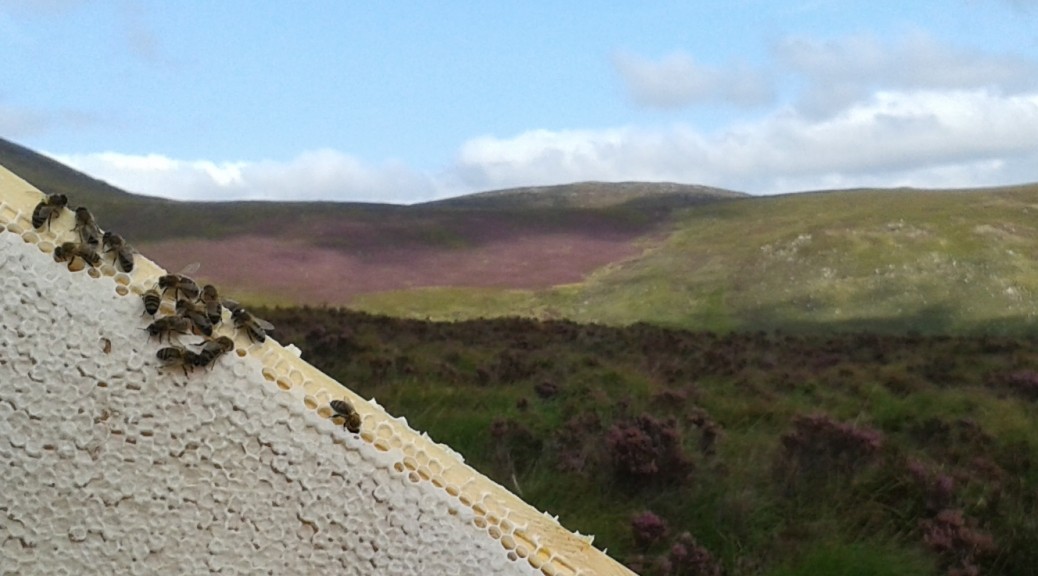
Apart from the weather, the most important element to ensuring a crop of heather honey is the strength of the colony.
To maximise your chances of success – your heather stocks should have:
- A new queen;
- A huge army of workers;
- Ample stores.
It can be difficult to find colonies towards the end of the summer with all three attributes but there is a relatively simple all-in-one way to prepare in advance.
Here’s what you do:
During the winter read L.E. Snelgrove’s book: ‘Swarming – Its Prevention and Control’
Click here for a review: http://beespoke.info/2014/05/23/book-review-snelgrove-swarming-its-prevention-and-control/
Then make yourself some Snelgrove boards. Instructions here: http://beespoke.info/2015/03/11/make-your-own-snelgrove-board/
As the spring comes in, keep an eye on your stocks and note the strongest, most productive colonies with one-year-old queens. Mark these colonies and have a Snelgrove board for each one.
Note: you will not be using these queens, you will be asking these strong colonies to requeen and be ripe for the heather later. But read on…
Once the swarming season commences, look out for your target colonies making queen cells. When the swarm cells have larvae and are well charged, don’t knock any down but prepare yourself to do an artificial swarm about two days before they are due to be capped. If you do this too early, the bees will not be fooled by an artificial swarm and will start the process all over again.
So long as you have the Snelgrove boards ready you can do an artificial swarm vertically.
Procedure for Vertical Artificial Swarm
- Find the queen and put her somewhere safe on the frame you found her but make very sure there are no cells on it;
- Go through the rest of the colony carefully and gently to make sure there are no sealed cells. If there are, knock those off, but leave the open ones. Don’t go shaking frames or you’ll wreck the cells and mess up the dynamics of the colony;
- Move the old brood box to one side and put a fresh one in its place with some drawn frames, some foundation and some stores. Leave a space in the middle;
- Put the queen, on her frame and complete with bees into the centre of the fresh box – give it one more look over as you do so to make absolutely sure there are no cells;
- Next put on the queen excluder and any supers;
- Now the Snelgrove board. Put the side with no doors to the back of the hive;
- Now put the brood box with the queen cells and all of the bees on top of the Snelgrove board and put on a crown board. Give this box an entrance by opening the upper door on the right as you stand behind the hive;
- If it could do with a feed – feed it then put the roof on.
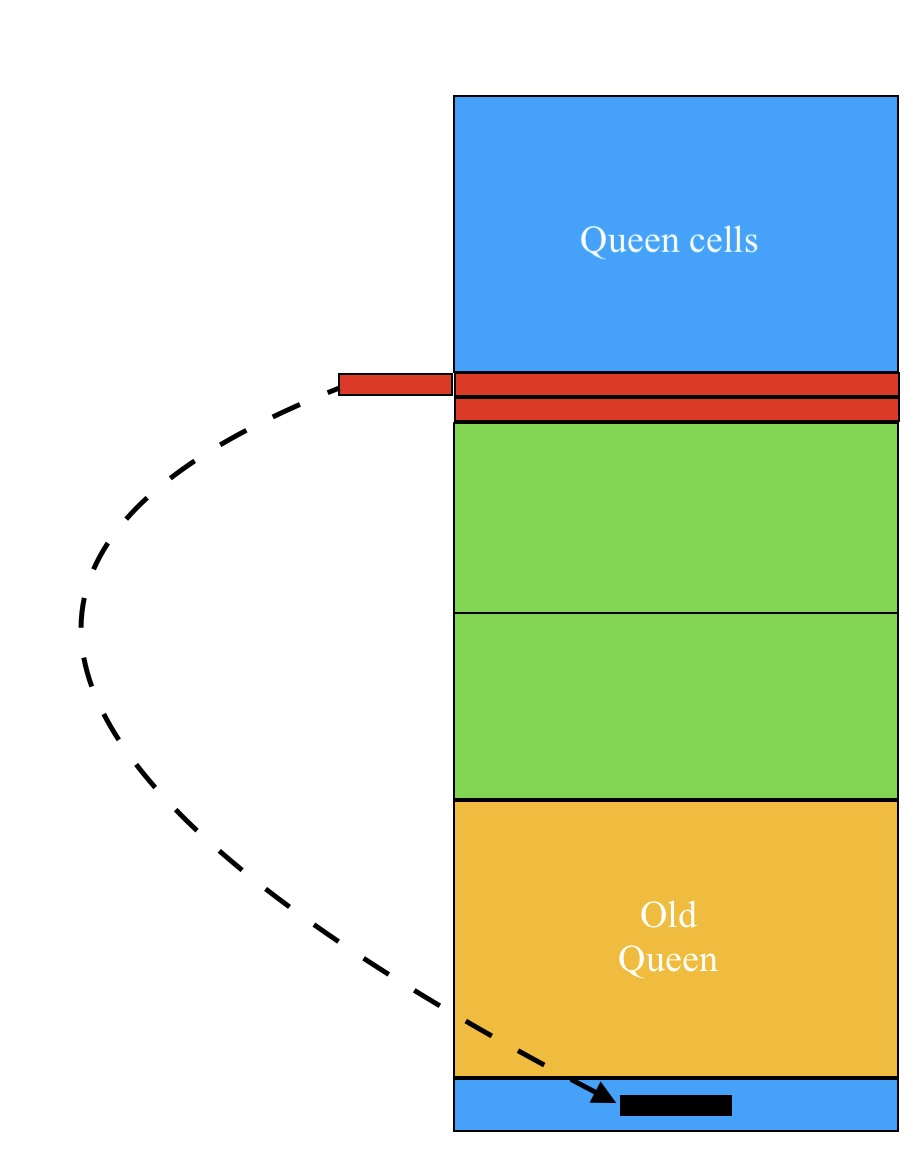
That’s the first bit.
The flying bees in the top box will leave via the upper right hand door but will return to the parent colony below through the door they have become used to. See Figure 1. and click that if it’s too small.
Seven days later:
- Come back and take a careful look through the bottom box, just to see that the queen is laying normally;
- Now very carefully indeed take a look at the cells;
- Are the they good enough?
- If you think they are too puny, you can always knock them off – remove the Snelgrove board and revert to a Demaree;
- So long as they look ok – leave them all alone – no need to knock any of them off:
-
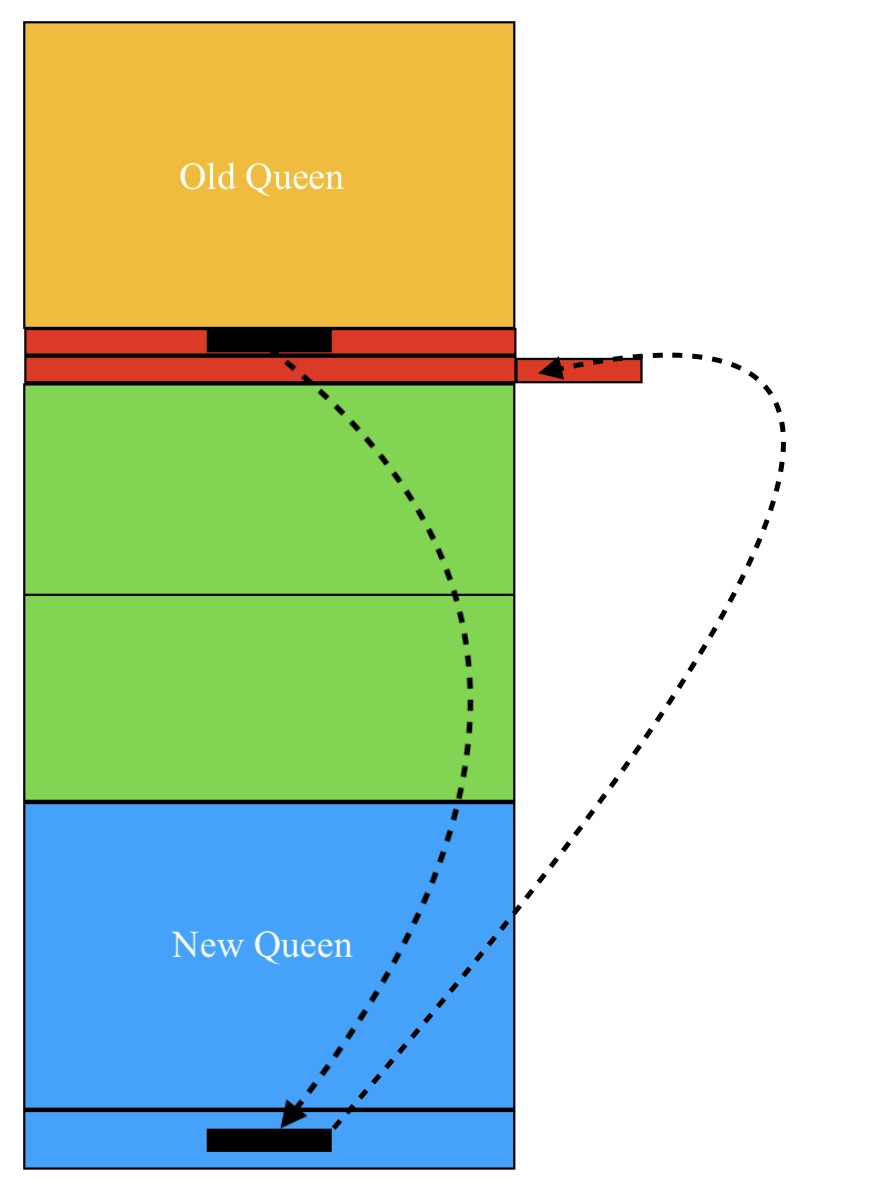
- Close the upper right door of the Snelgrove board (as you stand behind the hive);
- Open the bottom right door;
- Open the upper left door.
Bees will now leave through the upper left door and return to the right hand side but will enter by the lower door which leads, through the supers, to the parent colony below. This has the same effect as moving the hive to the other side when you do an artificial swarm the traditional horizontal way – it depletes the upper box of flying bees so it can’t swarm, instead they will choose the best cell and all being well, the virgin will get mated and a new colony will establish in the top box while the old queen will continue developing below. See Figure 2.

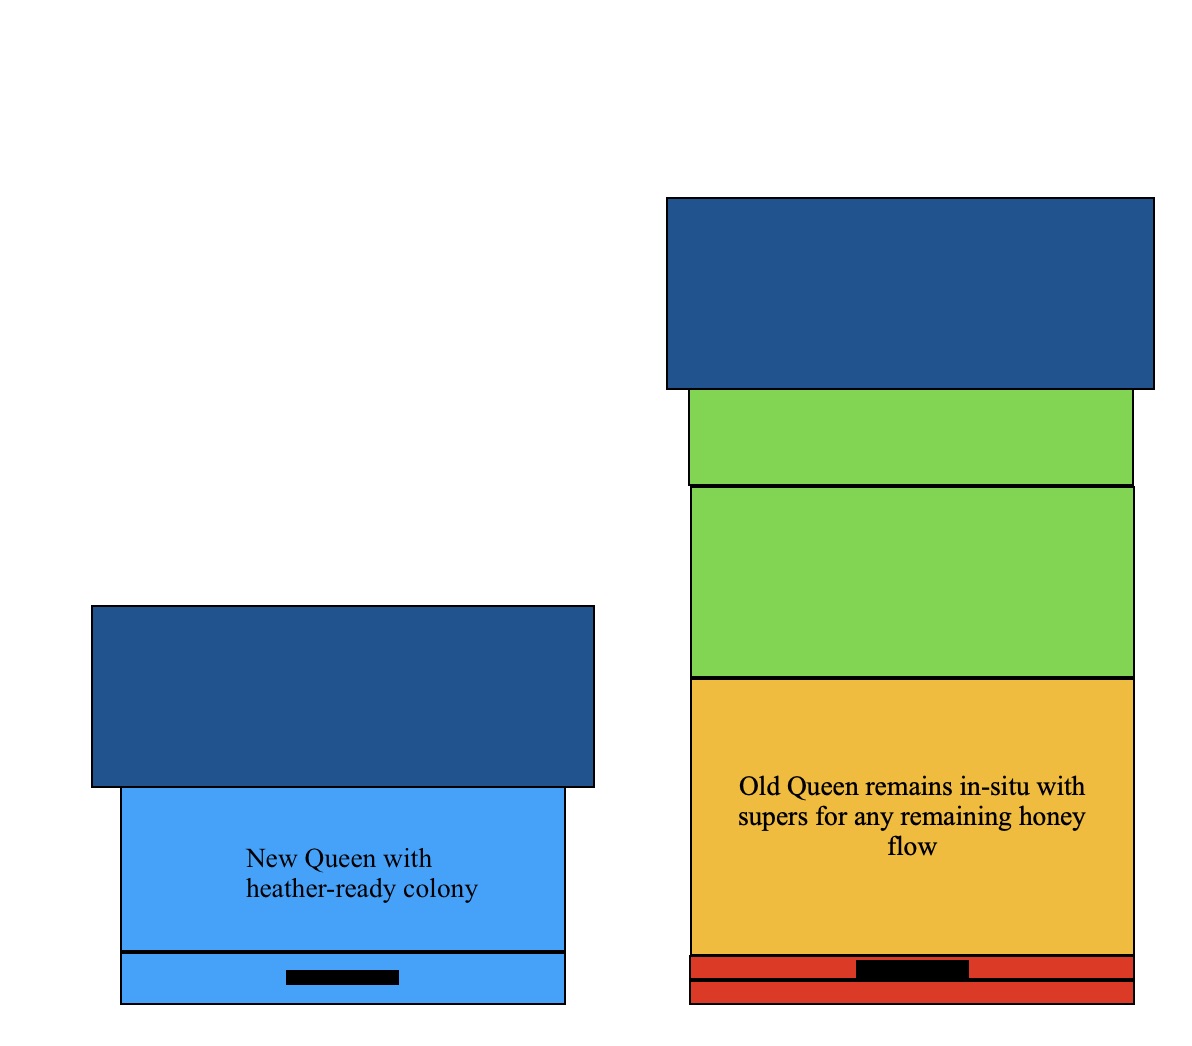
The Switch
Once the new queen has established herself properly and has about 4-5 frames of sealed brood you can swap the two brood boxes (Figure 3. below). Don’t forget, the two colonies of bees are in contact through the mesh in the centre of the Snelgrove board where they interact with each other throughout, the bees are effectively sharing the same communal stomach and are not strangers to each other.
Now:
-
- Close the lower right door (as you stand behind the hive);
- Close the upper left door;
- Open the lower left door;
- Move to the front of the hive and open the upper front door.
At this point, the new queen is in the bottom box heading up the larger of the two colonies and the old queen is in the top box.
Both entrances are at the front of the hive.
Bees returning to what used to be the new queen’s colony in the top box will enter through the lower left door to rejoin the new queen, via the supers, who is now in the bottom box.
Flying bees belonging to the old queen will leave through the upper front door and return to the bottom box through the front door – increasing the population of the new queen’s colony and reducing the old queen’s population in the top box. There will be a bit of milling around and confusion for a while.
Heathering
Here’s what you do when the heather is ready:
- Lift the old queen’s colony off the top, including the Snelgrove board, and set it to one side on the upturned roof;
- Lift the supers off the new queen’s colony and set them aside on another upturned roof;
- Check all is still well with the new queen;
- If so, assess the stores. Remember this colony is to go to the heather perhaps till the end of September – it could rain all the way there and even if it doesn’t you need to have the box stuffed with stores so that they will pack any heather honey into the super;
- Add a wooden Ashforth or Miller feeder (http://www.dave-cushman.net/bee/natmiller.html) with a good dose of either 2:1 syrup or commercial bee feed. The feeder will have to bear weight so it needs to be strong – read on ;
- Cover this feeder with an extra crown board;
- Now add the old queen’s colony including the Snelgrove board and her supers if there are any;
- Remove the crownboard and put the new queen’s supers, including bees, on top;
- Remember – as before – the entire tower of bees are all on speaking terms and will not fight;
- Bees from the new queen’s supers will leave through the old queen’s entrance in the Snelgrove board – upper front – and return to their own queen through the main front door;
- Return in about 2 days either in the evening or during the day if it is raining;
- The bees in the bottom box will have taken most if not all of the feed;
- The box will be stuffed and possibly overflowing with bees;
- Block the entrance with foam, brushing off any bees that are hanging out the front;
- Dismantle the colony removing the supers and the old queen’s colony – just so that you can strap and remove the new queen’s colony for the heather;
- Set the old queen’s box on the parent stand either on the Snelgrove board or on a new floor if you have one;
- Any flying bees or the overflowed bees will return to the old queen’s box so they won’t be homeless;
- Take the new queen off to the heather and super her when you get there.
If you are using fresh foundation or even sections (!) you shouldn’t need a queen excluder but if you are using pre-drawn supers – leave the excluder in place – an expanse of empty drawn comb might be too tempting for a vigorous young queen.
Timing
It is impossible to time this operation so it coincides exactly with the heather as it can begin to flower any time from the middle of July to the beginning of August but the method seems to work quite well if begun mid-May and is better begun early than late as there is flexibility once the queens have been switched.
Snag
There will be drones in your supers so you will need to let them out at some point. Clearing these supers with bee escapes will be problematic as there are sure to be a couple of drones left behind to bung up the works.
Good luck!
Click here for more about heathering
Click here for the heather ecosystem
Copyright © Beespoke.info 2019. All Rights Reserved.
Great description and instructions! -thank you so much!
Yet, I have to admit that in the section „Heathering“ I don’t understand the instructions from bullet #5 („Add a strong wooden Miller feeder…“) onwards…
It would be great, if maybe some more drawings for the various steps described there could be added on top of the final result of the proceeding.
Thank you so much!
Thank you.
Working on it…