
After you have fired up your Gateway and Monitors and made sure they are communicating with each other and with the Mother Ship as per the previous article – the very first step is to make sure you have a mobile signal at your intended apiary. If you don’t check this, your carefully assembled set-up may have to be carefully disassembled.
System
My system consists of a basic hive scale/monitor, a hive monitor, a weather station and the Gateway unit. These are all described in detail in the previous post. Click here if you don’t know what I’m talking about.
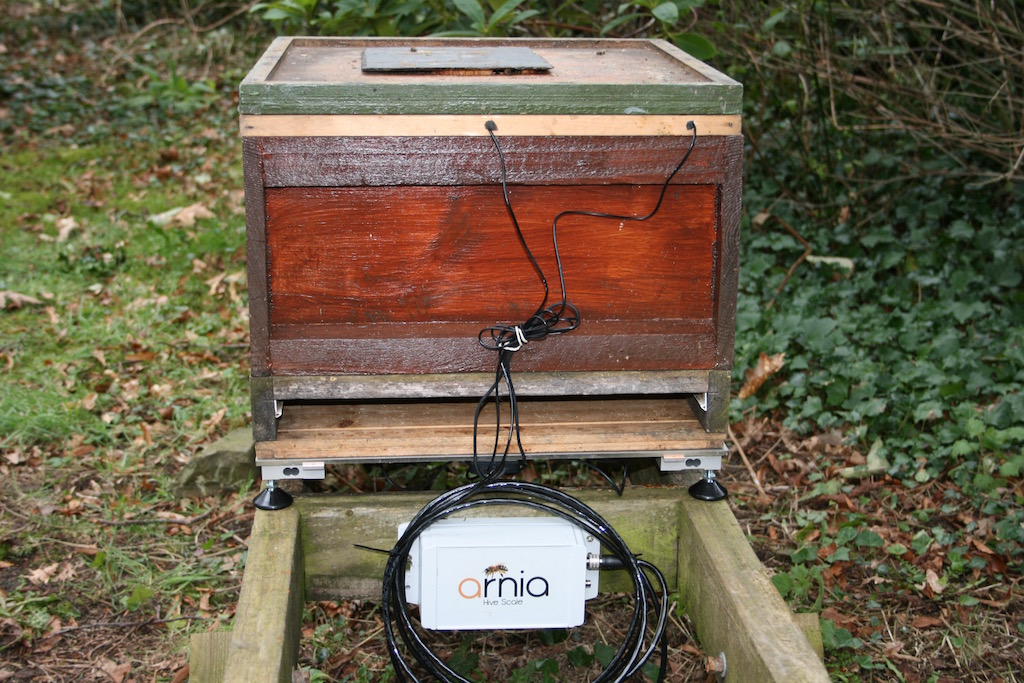
This hive (below) has been fitted up to the Arnia Basic Hive Scale and Monitor. Here’s how to install it with the bees.
Monitor Box
The Monitor’s Brain is in the grey box – it collects the data from the sensors and sends it wirelessly to the Gateway. You can screw it to the hive stand but it has quite a long cable so is quite versatile.
Sensors
The Basic Hive Scale has four attached load sensors plus three sensors which monitor hive activity. The latter need to be located thus:
- Sound – a microphone which assesses activity.
- Brood nest temperature (red) – a probe needs to go into the middle of the brood nest;
- Humidity (blue) – another probe goes between a couple of frames near the back.
Cold Weather Set Up
If the weather is cold, like it is here, much thought and preparation can be done in advance at home to avoid disturbing the bees too much.
Microphone
The microphone can be fitted to a spare floor then instead of grovelling about in the long grass trying to feed it through the entrance block – all you need to do is:
- Move the hive to one side,
- Position the hive scale,
- Set the new floor (microphone fitted) on the scale,
- Place the brood box on top.
Temperature and Humidity
The hive above has been temporarily fitted with an eke with two small holes drilled into one side. If you have one of these prepared in advance, all you need to do is:
- Gently remove the crown board;
- Take careful note of where the centre of the cluster is because when they all come to greet you – and they will – it won’t be obvious any more;
- Place the eke so the heat and humidity probes can be pushed though the two little holes;
- The temperature probe goes to the middle of the brood nest;
- The humidity probe sits between two frames near the back of the hive;
- Small nubs of foam rubber wedged into holes will prevent the wires from sliding out;
The ordinary hive monitor has the same three probes and they are fitted in the same way as the Basic Scale Hive . There’s just no scale!
When the weather improves, and the hives can be properly opened up – all three wires can be fed through the entrance then up and over the relevant frames.
Summer Set Up
If you set this up in the summer then you can avoid all this pussy-footing about and feed the lot through the front door.
Gateway
The Gateway collects data wirelessly from the monitors and sends it once a day to the Mother Ship over the mobile phone network so you need to position this where there is a mobile signal and within 30m of the monitors or the wireless won’t work.
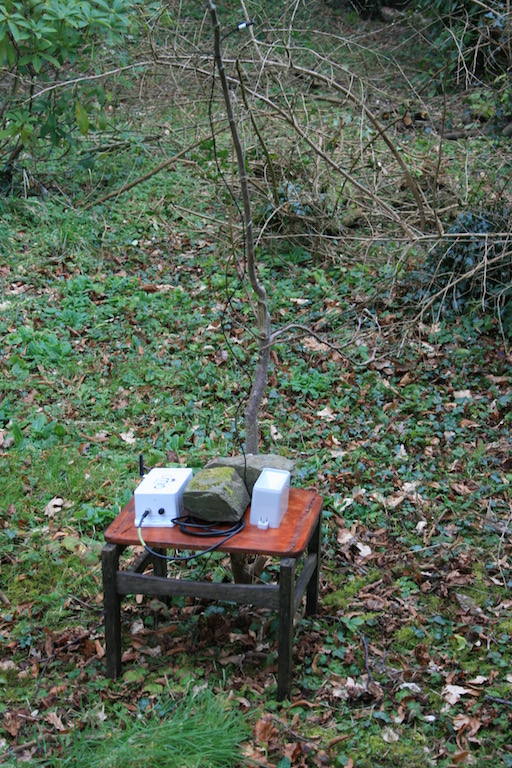
Weather Station
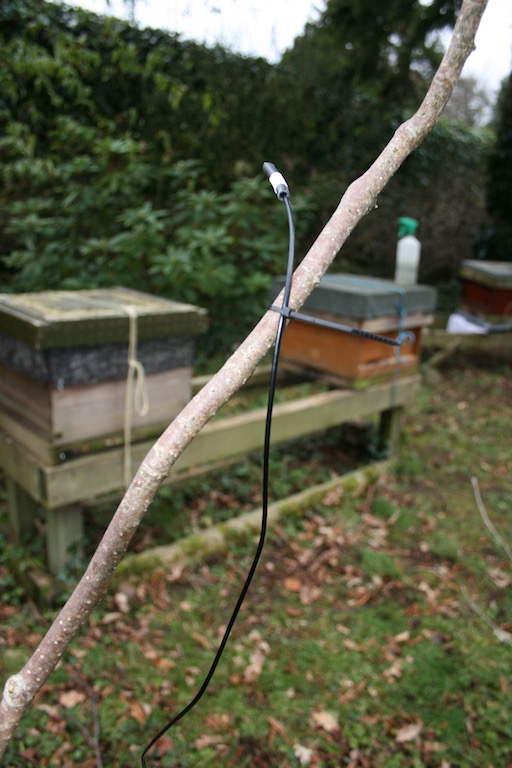
The Weather Station is a little grey box which collects rain and measures it as gravity pulls it down and out. It also has a sunlight sensor which is a wire with a white tip – the wire is about a meter long.
You’ll need to site the weather station out in the open and I’m not going to explain why.
Siting it needs a little bit of thought though because it is connected directly to the Gateway by a cable which is only so long. Also, the wire connecting the sunlight sensor to the Weather Station is only so long. This can be a bit of a conundrum.
In this case, the Monitor and the Weather Station are fastened to an adapted chair.
The sunlight sensor is taped up the little sapling thus:
And that’s all there is to it really. If all is well, your data will appear on your user interface.
Mesh Floors
One other thing about the scale hive though – and if you are familiar with open mesh floors you will know that slightest perturbation can have the flying bees all hanging up underneath the floor. The hive scale means the floor, and entrance, are lifted aloft about an inch so you will need to be prepared to block that gap till they adapt to the height change unless you are the hard hearted beekeeper who believes such trials are character building.
Murphy’s Towel
Anyway that white thing taped to the front bottom of the distant hive with duct tape is Murphy’s towel which is blocking the gap for now.
Murphy:
Click here for How to Set up your Arnia Monitors
Click here for Arnia Remote Hive Monitoring – First Data
Click here for more about Remote Bee Hive Monitoring and applications
Click here for a video overview of the Basic Hive Scale
Click here for video instructions on how to assemble your Basic Scale
Click here for How to Make your own Scale Hive
Click here for Bees, Honey and a Scale Hive
Click here for Remote Hive Monitoring Action
Click here for Useful Arnia Hive Scale Data
Copyright © Beespoke.info, 2016. All Rights Reserved.