I was reading an article about wintering bees and the author said any fool could winter bees, whatever the winter and however poor the beekeeper. And he has a point. The reason being that in order to successfully winter bees you just have to leave them alone. Leave them alone – they know more about it than you do. Well he might be right but if you keep an eye on your bees there are things to be done to prevent the losses we saw in the winter of 2012/13. Continue reading Things to do in February
Category Archives: Equipment
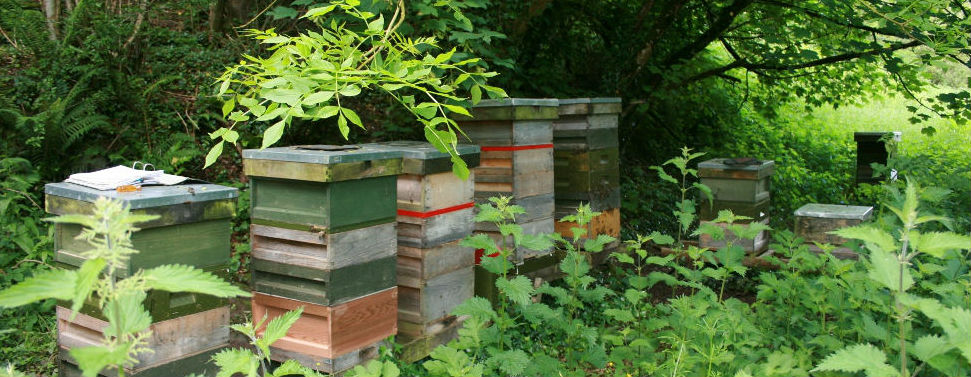
Bee Basics – Which Beehive?
Choosing which type of hive to use is like getting married – get it right from the start and stick to it; if you go messing about later, it will come back to bite you and you’ll regret it. Not all hive parts are interchangeable and you’ll end up in a right mucking fuddle. Continue reading Bee Basics – Which Beehive?
Bee Basics – the Beespace
Reverend Langstroth patented the beespace in America in 1851 and since then he is credited with its discovery.
This is Reverend Langstroth:
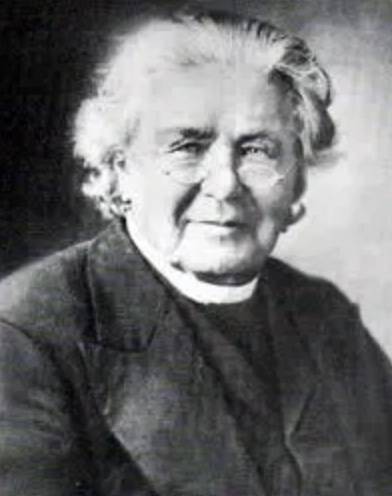
However, it was already in use in Europe by the following two gentlemen – Johann Dzierzon and August von Berlepsch:

But what is the beespace I hear you ask. Well unless you are a Developer you will have heard of Building Regulations and be familiar with the concept of Standard Sizes – for example the standard size for a doorway in a house is 775-800mm wide by 2100mm tall. This allows us humans to move about the place without ducking or turning sideways. Continue reading Bee Basics – the Beespace
Beekeeping Equipment
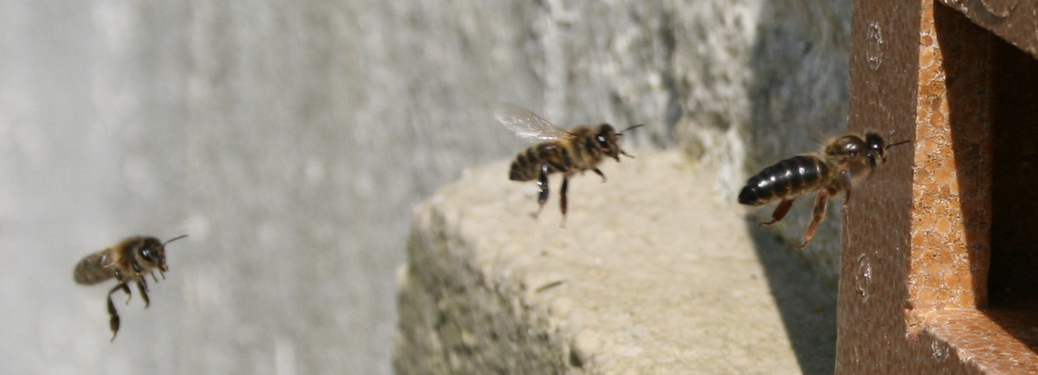
Be aware – taking up beekeeping is not cheap.
Do not be seduced by those apparently serene beekeepers who need no protective clothing and go at it in their sandals and an old onion bag. Bees are easily irritated as a rule, in fact their only tranquil moments are experienced as eggs.
In addition:
- They are horribly attracted to the human foot;
- They know where your eyes are;
- They are never, ever hampered by emotions.
So trust me – if you are seriously thinking of taking up beekeeping, get proper equipment and build your confidence inside it. Continue reading Beekeeping Equipment
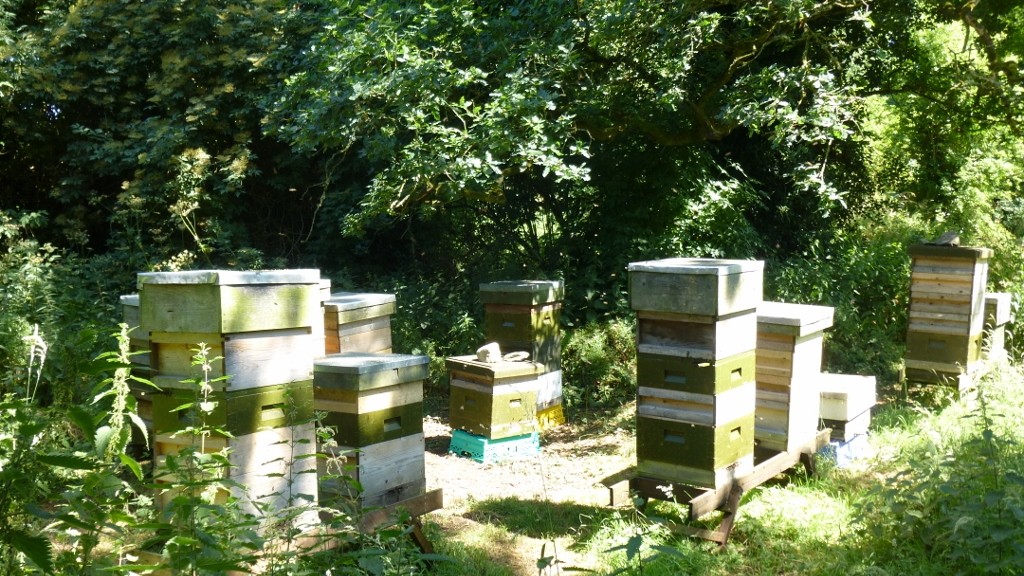
Do Bees need Insulation?
Personally I don’t think there is any need to insulate the roof spaces even if you are using mesh floors. And even if it turns colder.
I only did it one year – my first year with bees – I cut up one of those tin-foil survival blankets and put a piece over the crown board of each hive; it did no harm anyway. Since then we’ve had two very severe winters with temperatures below minus 12 degrees C at night for several weeks at a stretch and I lost hardly any bees. Bees are well able to thermoregulate so long as they have the stores – with or without mesh floors. Keep an eye on them and heft regularly. Try not to disturb them but if they seem to be close to the top of their stores put a cake of fondant over them.
If you make your own equipment it is possible to construct a hive stand which provides the hives with a 10cm deep ‘skirt’ which will prevent a lot of drafts.
Copyright © Beespoke.info, 2014. All Rights Reserved.
How to set up an Apidea
Mating nucs, or ‘mini nucs’ are a great way of getting a new queen laying using the minimum of resources. Should she fail, little is lost but if she does get laying – a spare queen is a great thing to have!
Apideas are far and away the best mating nuc on the market – they cost a little more but are worth every penny for the elegance of the design and the quality of the product.
There’s more than one way to skin a cat and the same can be said for Apideas but here is how I’ve been doing mine for the past 15 years… Continue reading How to set up an Apidea
Frame Assembly – Good
This is how to assemble a frame properly but don’t do this too early or your wax will go off:
 Remove the wedge cleanly or it won’t sit properly when you put the wax in. It doesn’t matter too much with wired wax, but if you’re using unwired wax the wedge won’t grip it properly. If necessary shave the area clean with a nice sharp chisel.
 Continue reading Frame Assembly – Good
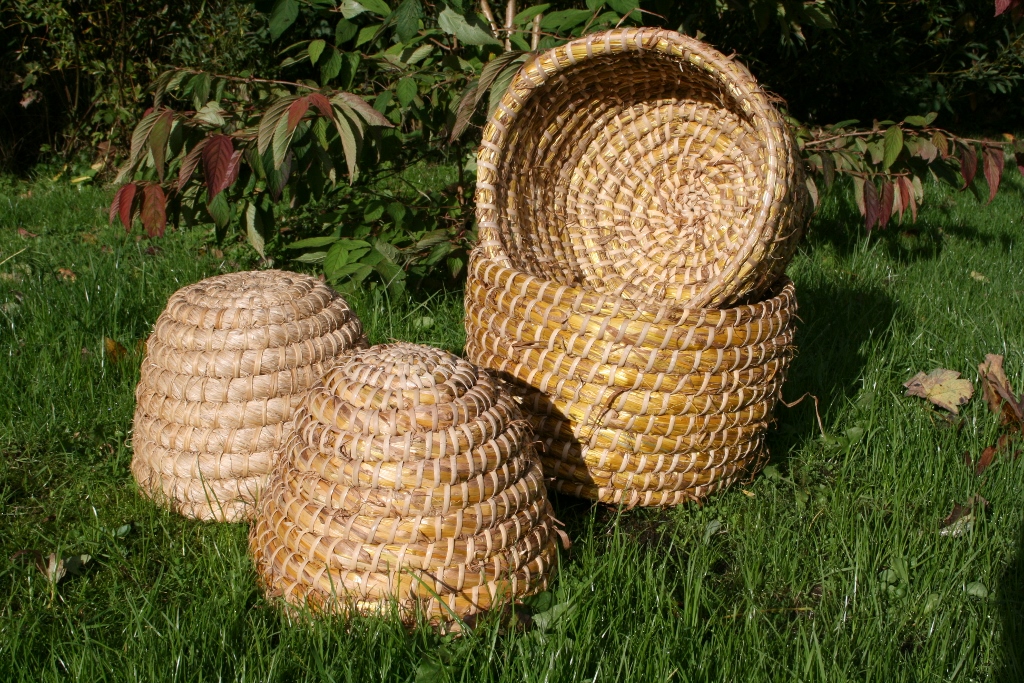
Make your own Bee Skep
Once upon a time, all beekeepers would have made their own skeps using materials they could find locally. The theory of skep-making is simple enough: a length of straw rope, tapered at each end is coiled into a basket shape and stitched into place with a tough binding. It is a time-consuming and messy business though and should be done either outside in the elements of a warm, breeze-free day or in the corner of a garage or workshop. I should add that it takes practice.
Materials
There are two categories of materials:
- the coil of rope forming the body;
- the binding holding it in place.
A variety of different materials can be used for each, depending on what is readily available – selection below. Click image for close up.
The Rope
The rope can be straw, grass, rush and even heather – almost anything fibrous which is relatively long, tough and flexible can be used. Some materials are more durable than others and generally, the tougher the material the more difficult it will be to work.
Oat straw makes a good lightweight skep and was the most commonly used material in this far flung corner. Wheat or barley straw will also suffice you just need to find some with nice long stems.
Rushes such as the common soft rush Juncus effusus are soft and easy to work with but the central pith will take up atmospheric moisture and the skep will soon rot.
Purple moor grass, Molinia caerulea, is an exceptionally tough and durable upland grass found throughout Britain and Ireland and used for skep making in Scotland. There’s a lot of that around here so that’s what I started with. You can use either the leaves or the flowering stems and the plant obligingly sheds both in the autumn so you can go along and just pull it up by the handful. The leaves are nice and soft and easy to work but the flowering stems tend to be a bit brittle. They are easier worked if they are a little green when gathered but once dried no amount of soaking will de-brittle them enough to make them turn tight corners but they can be incorporated into the skep walls.
Click here for more on Purple Moor Grass
The Binding
Whatever the chosen material for the rope, the binding would traditionally have been bramble or sometimes nettles.
Brambles aka blackberry or Rubus fruticosus were were traditionally used, probably because they grow almost everywhere and they are so tough but the preparation is labour-intensive: the fronds should be one year old growth and no older as the stems become woody and tough with age; these need to be cut in the late summer or early autumn and stripped of leaves and thorns before being split lengthways, de-pithed and stropped to improve their pliancy. Finally they can be hung somewhere cool and dry to season.
Nettles have their own problems.
There are modern alternatives. Jute or other hairy strings are convenient and cheap but their durability is variable and some sources suggest that the hairiness and the smell of oils used in their manufacture are irritating to the bees. Synthetic baling twine is the cheapest of all and can be used if you don’t mind blue (or orange) but it will degrade in sunlight and your skep may burst asunder at a vital moment.
Lapping or binding cane is a renewable rattan product from the Far East and is a reasonably priced alternative, there is little preparation and it comes in the post. If lapping cane is used, ideally it should be pre-soaked for several hours to increase its pliancy.
Tools
- A bodkin or marlin spike to pierce the rope;
- A section of cow horn or the neck of a plastic bottle to hold and funnel the material into a continuous rope of uniform thickness;
- Scissors;
- Tape measure;
- Long nosed pliers.
Method
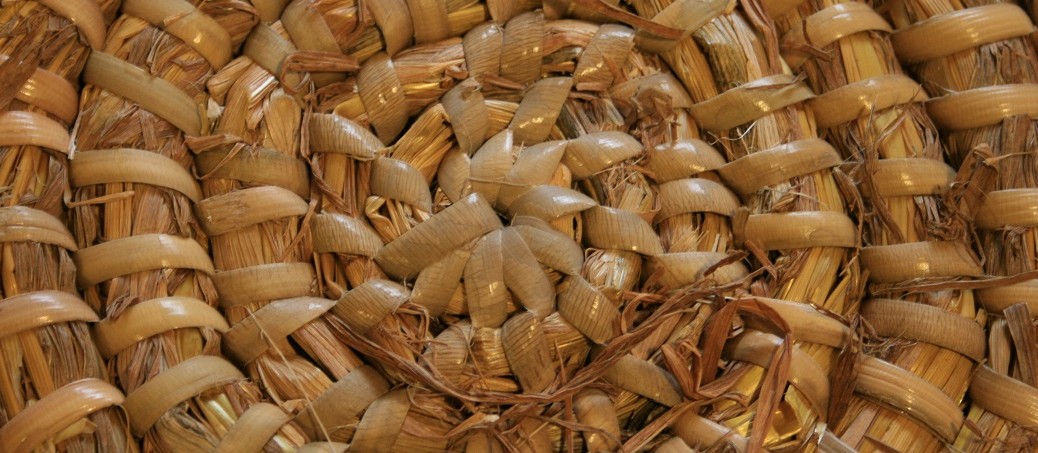
The skep is begun from the centre with the inside of the basket towards you. Work progresses outwards in a flat spiral then gradually the coils are directed upwards to make the walls, finally tapering off at the rim.
The first and most difficult thing to do is to get started.
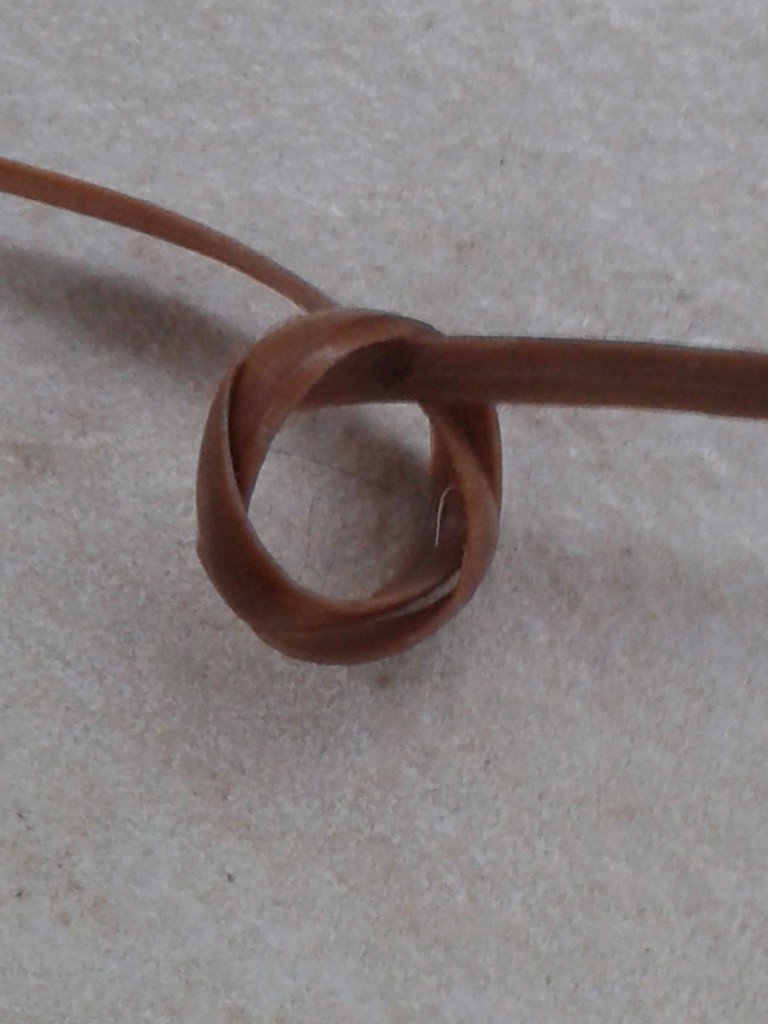
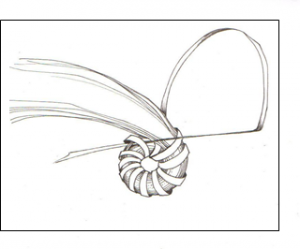
- First take a soaked length of lapping cane and form a simple knot and – holding it this way up with the long end to the left…

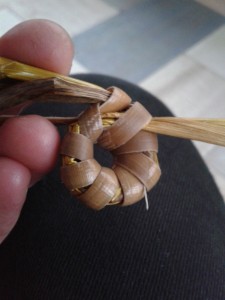
- Take 3 straws and, working with the thin ends lay them across the active length of cane (the one on the left) then bring the cane over and pass it through the loop trapping the straws thus;


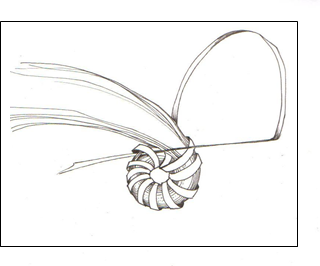
- You need to stop now and think because the direction in which you start the binding is very important – once begun it cannot be changed. If you are right-handed you will probably load material into your rope from the left, leaving your right hand to do the stitching. The inside of the skep is facing you;
- Continue binding the straws to the centre by passing the cane though the centre each time and slightly overlapping the previous stitch until you have completed a full circuit and it should look someting like this from the inside…
 And like this from the outside… an eyelet with the smallest possible hole in the middle.
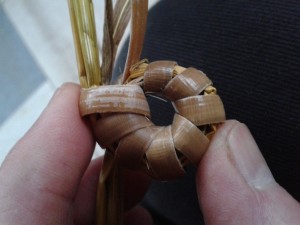

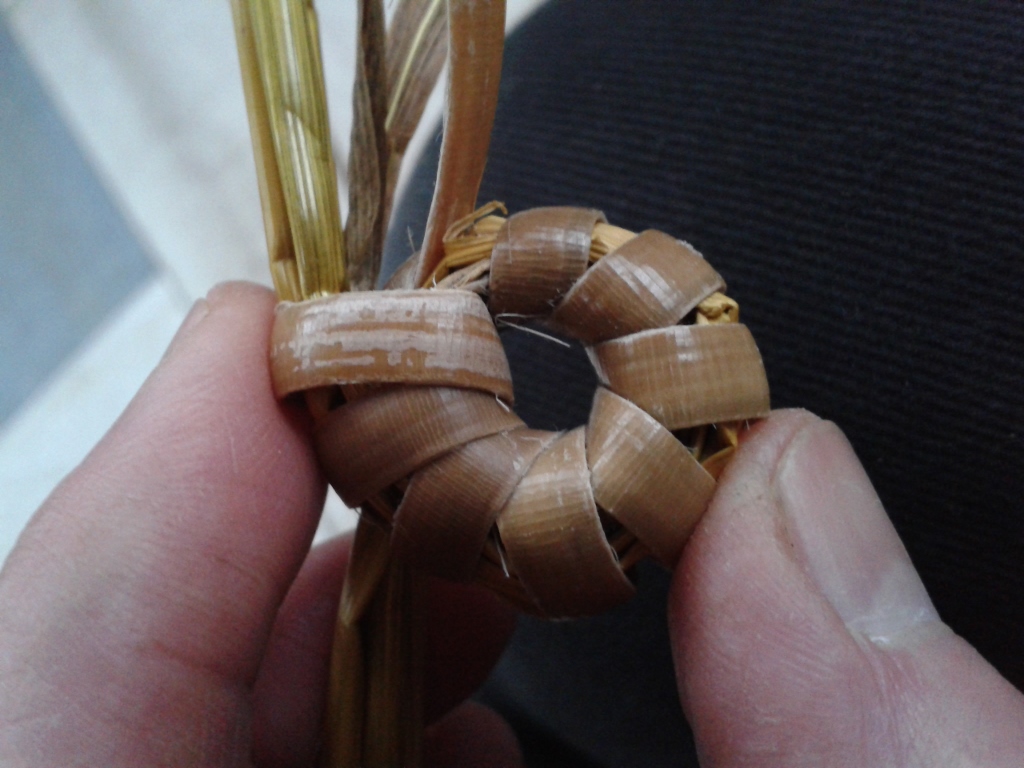
- You can now start catching the stitches of the previous coil and as you do so, you need to start adding straws – this time add them one at a time butt end first – push them into the middle of the others until they grip.
- With the scissors, trim the working end of the cane to a point and use the bodkin to ease a passage beneath a stitch then push the cane through. Pull tight and repeat, binding the coils to one another as they expand.
- Loading the rope is important. Keep loading one or two straws at a time, gradually building it up until it is thick enough to fit the horn or plastic guide. From then on it is important to maintain a snug fit in the guide by loading little and often. Do not allow the guide to become slack as this will introduce a weakness. Too tight and you’ll get a bulge.
- Give the rope a twist as you go and this will further tighten the structure;
- As you progress away from the centre, the stitches will become further apart so you should add stitches periodically by tightly circling the rope once with the lapping cane between stitches and holding it tight until the next stitch locks it into place. If you are making your own skep the size is completely up to you but generally a swarm skep has an outer diameter of about 14” and height of 10” and will take about a day to make. Harking back to grain measures – a 15”x10” skep holds one peck, or a quarter bushel, while one of 14”x15” will hold about 2 pecks – half a bushel. Which size you choose depends on your average swarm size – 1 peck or 2!
- Start the walls about 2” before you have reached the required base diameter because it will take a couple of laps to round the shoulder fully. Up until now you have been binding coils one to another in a flat disc but now you need to change the both alignment of the coils, one upon the other, and the positioning of the stitches. Remember you have the inside of the skep towards you.
- Finishing off is just a matter of finding the right place to stop so there isn’t a lop-sided look. Once that is decided, stop loading the rope but continue the stitching until the rope tapers off to a point then just tie off the end and thrust it out of sight.
Click here for 2019 Skep Course
Click here for guidance on how to add a new binding cane
Click here for more on Purple Moor Grass
Click here for Skeps and Skep Beekeeping
Copyright © Beespoke.info, 2015. All Rights Reserved.
Frame Assembly – Bad
Copyright © Beespoke.info, 2014. All Rights Reserved.

You know – it is so irritating when you’re stripping down frames and discover that they’ve been put together wrongly. It’s usually one of three mistakes – or all of them, as in this frame.
First of all, don’t use panel pins – they’re too thick, they’ll split the wood and they’ll rust. Instead use proper 10mm lacquered frame nails or gimp pins available from beekeeping suppliers.
Don’t put a nail sideways through both bottom bars. Why? Because when you come to take it apart you won’t be able to remove that pin unless you chisel away at the wood so you can get hold of it with pincers. And unless you do remove that pin – it will obstruct the channel that your new sheet of wax is destined to slide into. Instead nail downwards into the endgrain of the side bar and towards the top bar. The bottom bars don’t support any weight so they won’t come adrift and you can tap them out with a hammer when you need to.

Thirdly, don’t nail straight through the wedge into the top bar – your pin will almost certainly come out the other side and every time you try to clean that top bar your hive tool will come up against the points.
