When left to their own devices and given a hollow tree, honey bees create a colony that is round in cross section and oval in long view – egg shaped in other words. But our hives are all square.
Are we trying to force a round peg into a square hole?
A straw sun hive, allows honey bees to be themselves and build a warmer egg-shaped home. Here’s how to make one.
When German sculptor Günter Mancke set out to design the sun hive – his impetus came from:
“… the need to free the bees from a principle at once earthbound and cuboid, one that goes against every law of form – we are dealing here with laws that are particular expressions of a creature’s life. There are many reasons for bees’ present-day afflictions. We can be sure, however, that one of these reasons is that the creature, as a physical and ethereal entity can no longer live its life as it is meant to.”
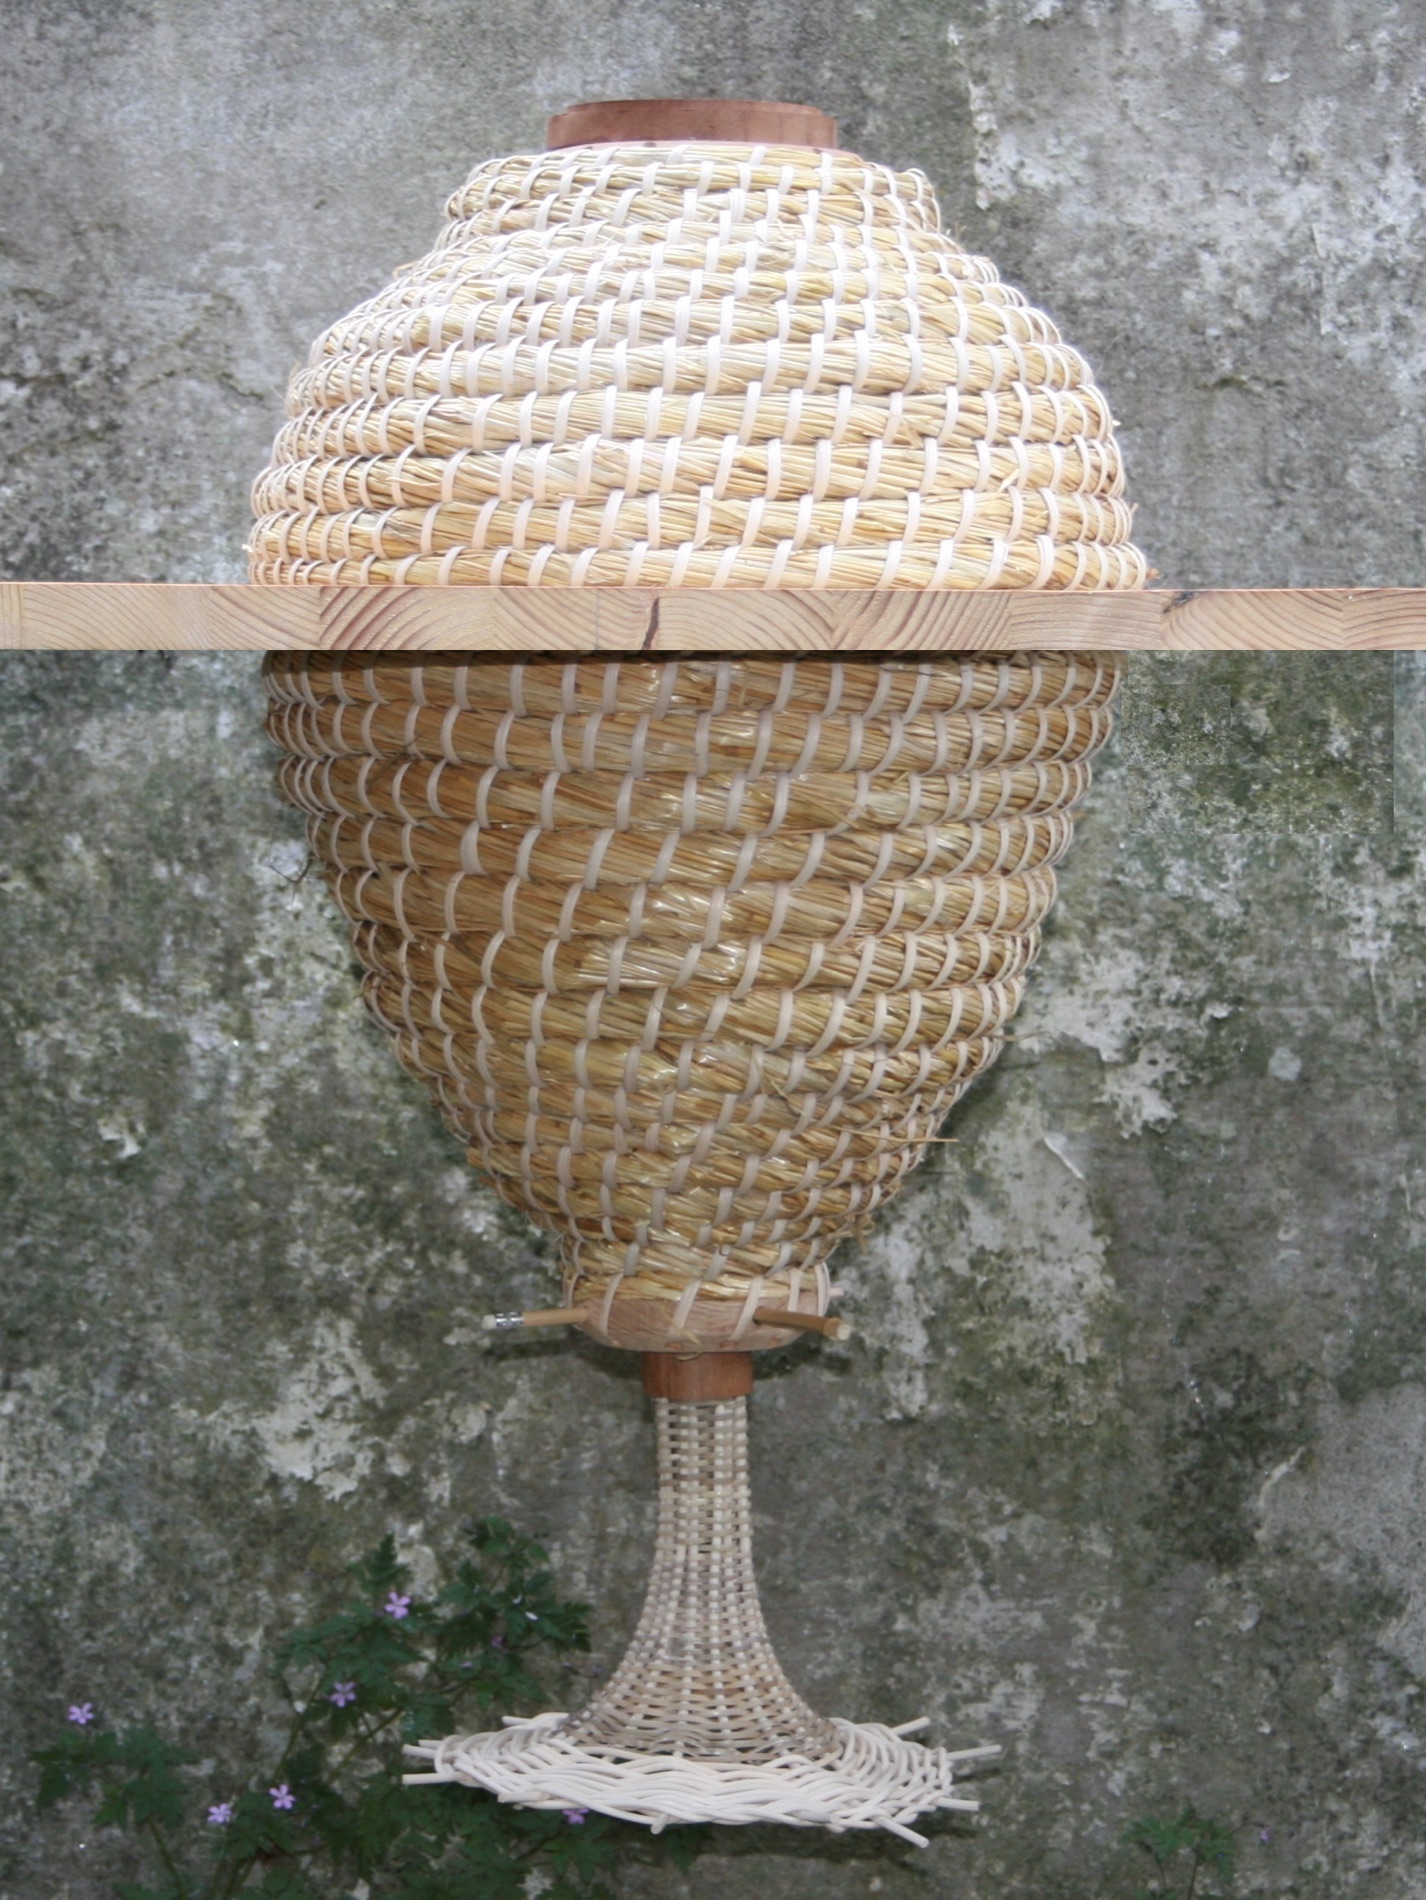
So his sun hive is egg shaped, like a giant queen cell in fact, with thick straw walls for warmth and no cold, damp corners. Essentially it is two skeps, clamped together above and below a central division board with an entrance at the bottom, over an ornate funnel-shaped landing board. It is intended to be hoisted 8ft into the air – the height that Tom Seeley has determined is the bees preferred residential height.
But this is not just a large, airborne, double-decker skep. It has removable ‘frames’ so beekeepers can carry out some inspections if need be. It will also accept a feeder, a super and some varroa treatments too.
You can’t buy a Sun Hive so if you want one you have to make it yourself. Full instructions can be found in – ‘The Sun Hive’ by Günter Mancke. Unfortuanately it is no longer available but it was published by the Natural Beekeeping Trust and they may be able to help you to source a copy or perhaps a course. Contact form here: https://www.naturalbeekeepingtrust.org/contact
Then came the Virus and with it, those sunny Lockdown days when we all had time to step aside from the real world for a while and do other things. So we decided to make a Sun Hive.
There are lots of components to consider:
- Wooden parts;
- Canvas hood;
- Skeps;
- Entrance Funnel;
- Siting and weathering.
1. Wooden Parts
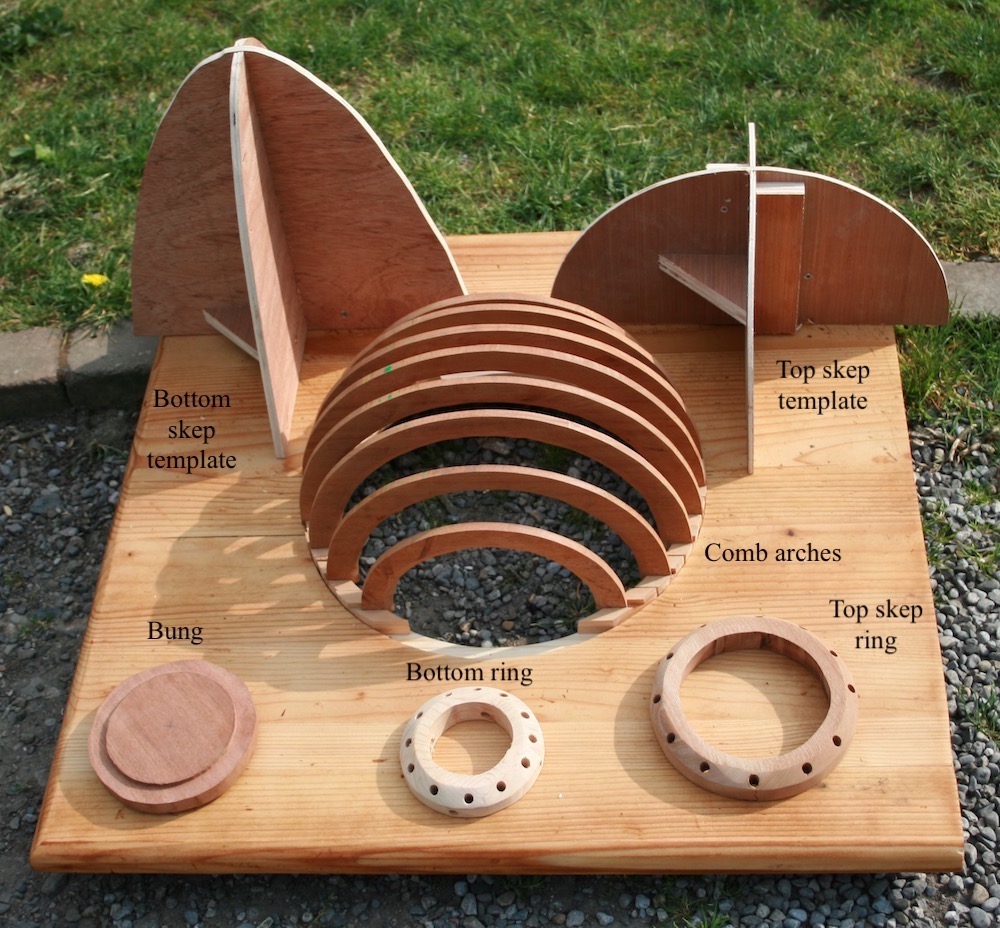
At the heart of the sun hive are the nine comb arches. They stand astride the circular hole in the centre of the division board with their little, shaped feet in the arch-foot-recess. The bees hang up on the arches and draw their combs downwards through the central hole and into the lower skep. The arches and the attached combs are removable – with care and a prong to hang them on.
2. Canvas Hood
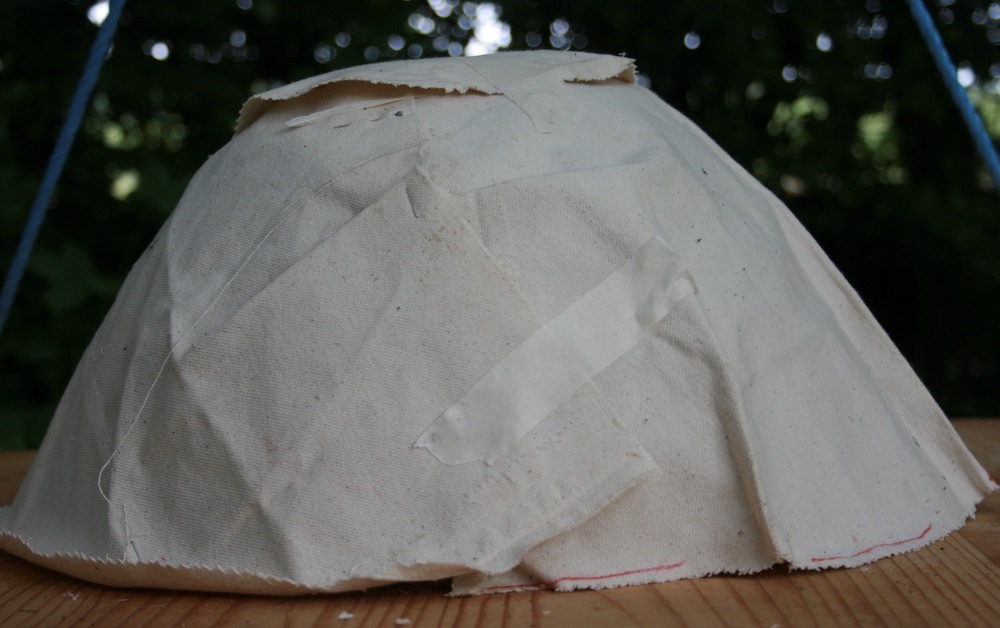
The arches are enclosed in a tailored, three-piece cover-cloth made of coarse canvas. The cover cloth has a dual purpose:
- to prevent the bees from building comb between the tops of the arches and inside of the over-skep;
- to encourage propolising.
The canvas cover is made up of three pieces cut to size and shaped to cover the hemispherical top of the arches. There are two pieces shaped rather like a very flared skirt with semi-circle cut out of the upper edge. Together they enfold the flanks leaving a circular aperture like a neck hole on top. This is covered with simple circle of canvas. The circle can be removed if a feeder or a super is to be added.
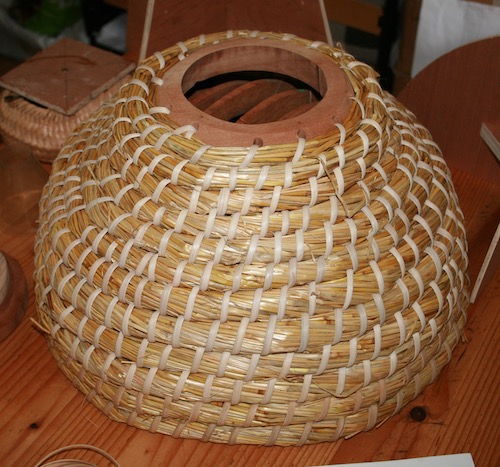
3. Skeps
There are two skeps:
- The over-skep sits on the division board enclosing the arches and canvas cover;
- The under-skep is pegged to the underside of the division board by four wooden pegs.
The two skeps are built around templates because their sizes and shapes are important.
The over-skep houses the arches so the template is a simple hemisphere with diameter two bee-spaces bigger than the arches.
But the under-skep will house what are essentially wild combs drawn down free-style by the bees and suspended from the arches so the shape of under-skep-template is more complex. It is formed by attaching the ends of a chain to two points 36.5cm apart, on a vertically held sheet of plywood. The curve formed by the chain hanging under its own weight is called a ‘catenary’. The shape is traced onto the plywood which can then be cut out.
The reason Günter Mancke gives for this requirement is that when bees are drawing wax, they hang in chains and the shapes they make under the influence of gravity are catenary curves..
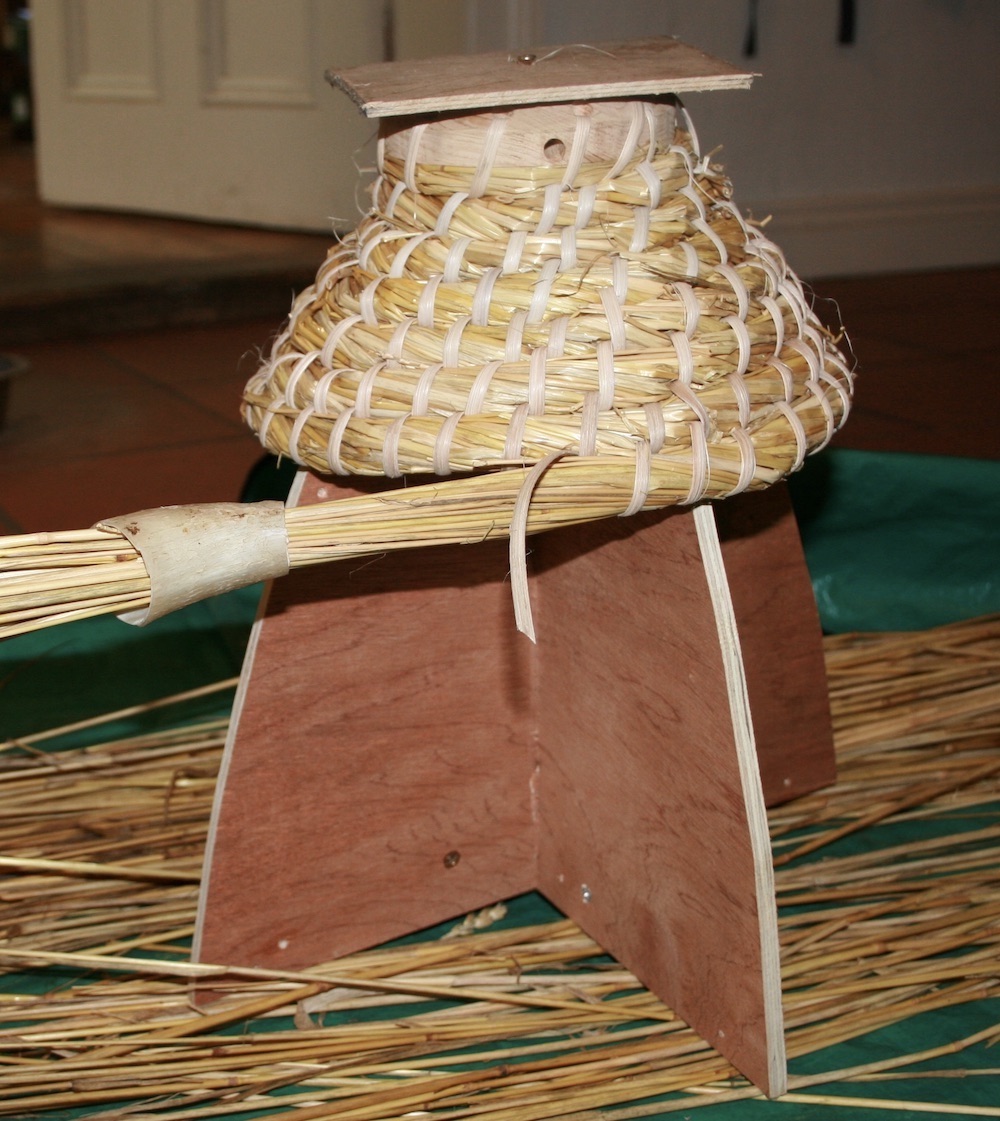
The start of each skep is a straw rope stitched around a wooden ring.
After a single lap, the wooden ring is then clamped onto the template and further laps are formed around the template.
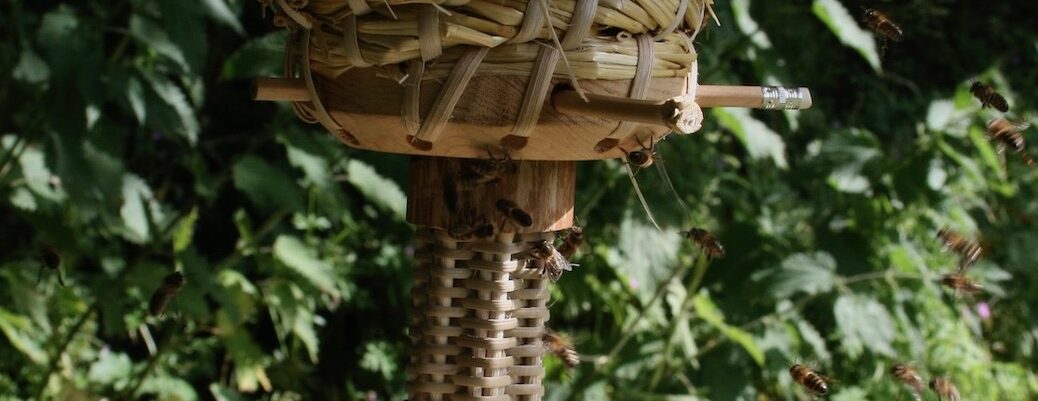
4. Entrance
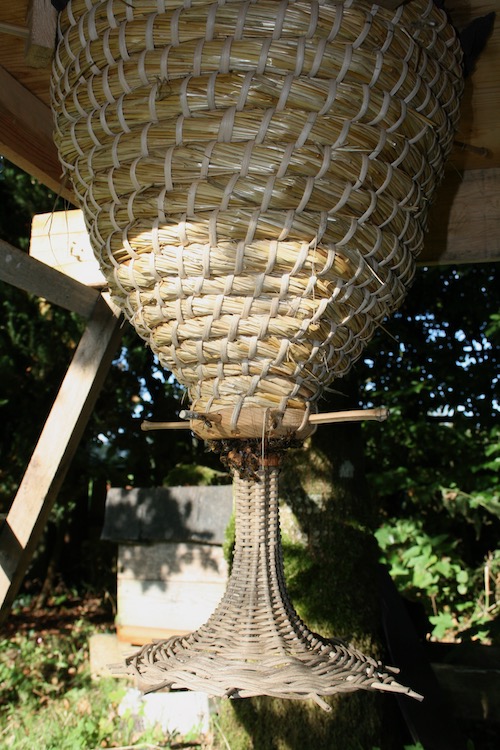
The wooden ring at the base of the under-skep is equipped to hold the entrance funnel which is essentially a decorative, woven landing board. The bees walk up the outside (not the inside) to an entrance which encircles the top of the funnel-neck housing inside the wooden ring. It’s held in place by wooden sticks, which go all the way through so the funnel will stay put whatever the weather.
This funnel is a bit too long in the neck – aesthetically speaking – but the bees seem to like it. When they are very busy they sometimes tumble as they’re making their way up in a hurry but the flared skirt catches them nicely.
5. Siting & Weathering
The sun hive book offers several suggestions on how and where to house a sun hive. Mostly they are rather elaborate gazebos with steps and thatch but allowing the sun hive to be hung up quite high and under cover. A gazebo like this would need a lot of forethought, skill and possibly even planning permission.
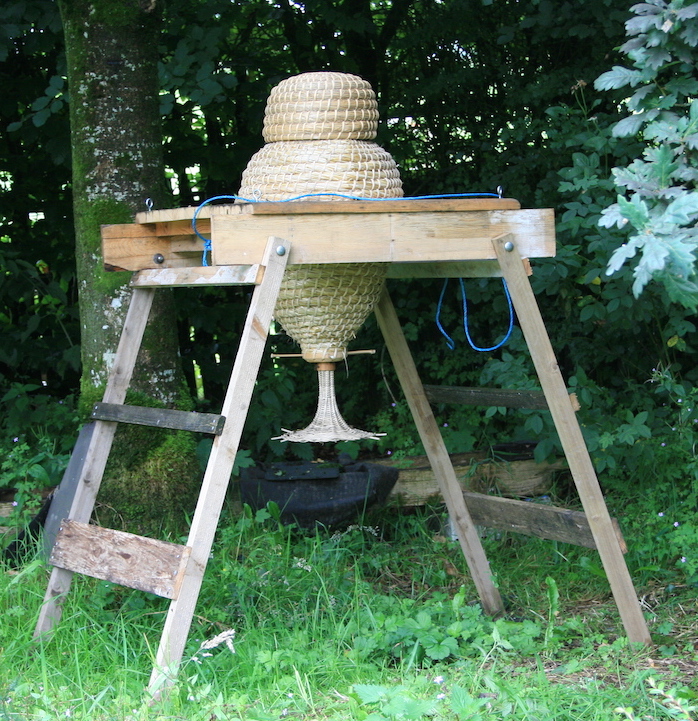
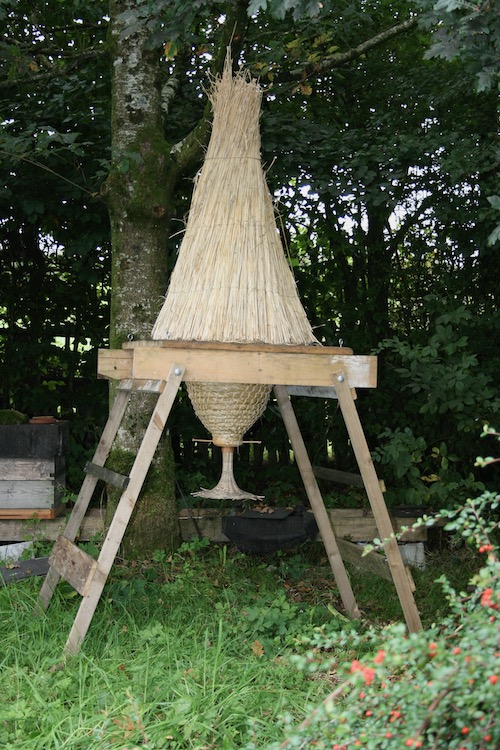
Alternatively there is a sort of high table, about a metre tall and the sun hive sits in the middle of it. In fact if you type ‘sun hive’ into Youtube you will find a video of a man in shorts, somewhere hot and sunny going through his bees. Or see below. His sun hive sits on just such a table but the entrance is quite close to the ground and the hive is out in the open.
Straw skeps do not weather well and will rot if exposed to wet weather so, here at the wet end of Europe, some sort of protection is essential.
In days of yore, skeps were housed in purpose-built recesses known as ‘bee boles’. Or they would be plastered with a stiff mortar of cow dung, hardened with gravelly dust and ashes (or lime) known as cloome or cloame.
Another alternative is a hackle which is a sort of thatch made from bundles of reeds or wheat straw, stitched together into a mat then curled around into a teepee shape. A flower pot placed on the top will direct rainwater away from the centre. A metal or willow ring sized to sit halfway down the cone-shape can be used to attach ropes and anchor the whole structure for the winter.
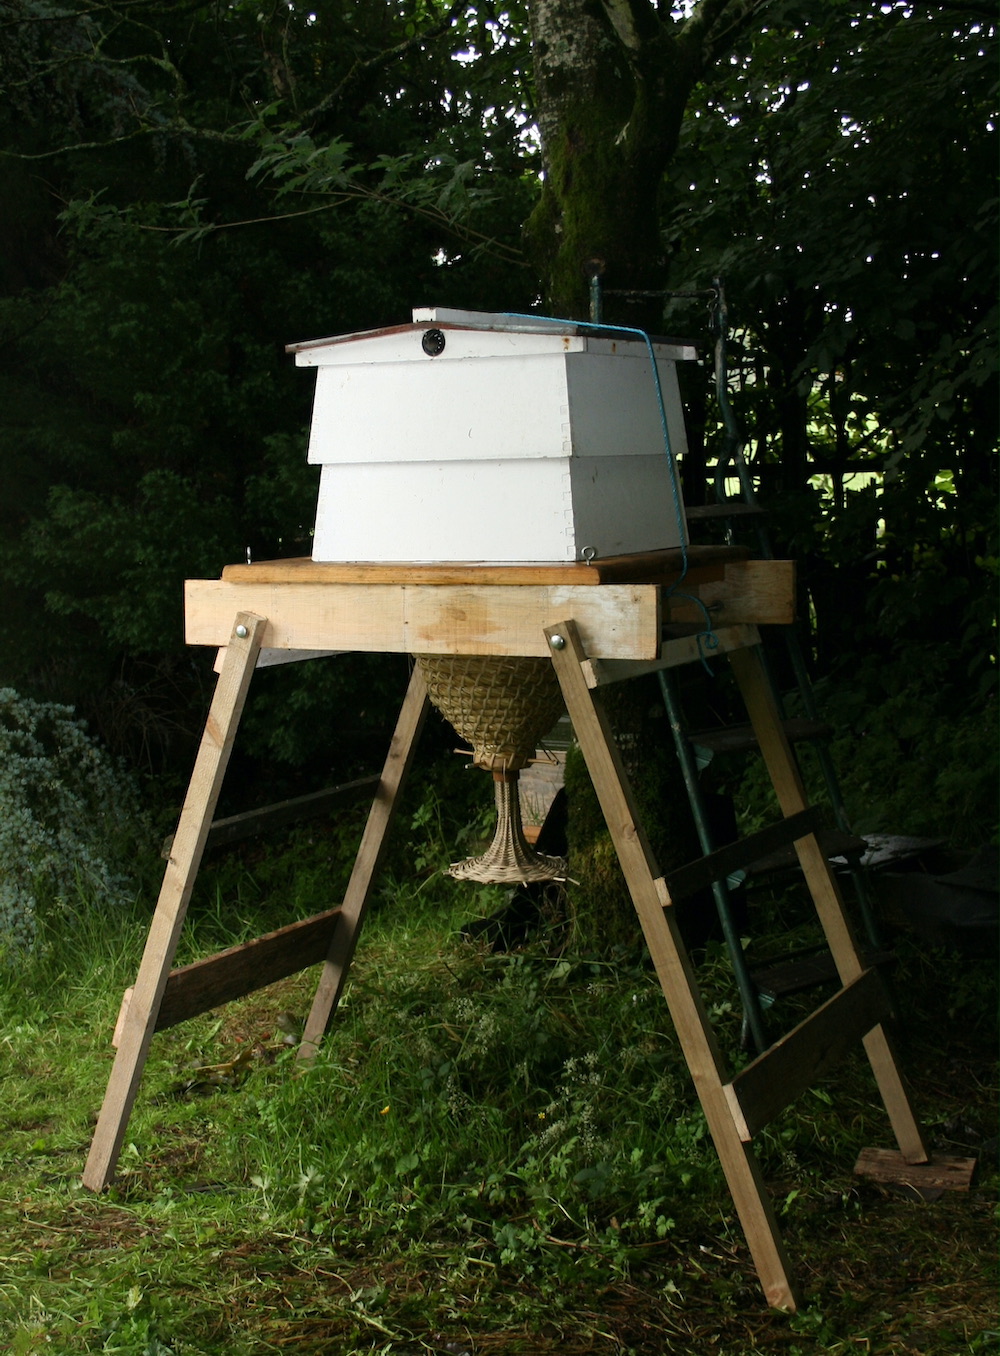
However, sometimes it’s better to be pragmatic so the sun hive goes into winter inside a WBC. The table seems to be enough to protect the bottom half from the elements.
Click here for more about skep beekeeping
Click here for how to make your own skep
Copyright © Beespoke.info 2020. All Rights Reserved.
Measurements for the wooden parts would be helpful
The measurements and full instructions can be found in – ‘The Sun Hive’ by Günter Mancke.
Available from https://www.naturalbeekeepingtrust.org
But that book is no longer available. I’m trying to find one to purchase (so that at least I can pay someone to make one, as I am too arthritic anymore), but the only copy I can find is in French, which is not one of my languages. Where can they be found?
Hi Judith, not sure how you went but I have a copy. I can scan it for you if you like.
Email me at Pauli.darren@ gmail.com if you would like me to.
Hi…!
Please i too interesed.
organicoschillan@gmail.com
Regards
Oleaee, do You have some respondes ?
i just want to buy one iam a expieranced beekeeper but don’t have the time to build one
Thing is they take so long to make and I don’t think they could be made by a machine.
So if they were available they would be so expensive nobody would buy them.
Perhaps that’s why they aren’t available.
Very interesting.
I have been doing research into these and, living in Poland, I would need to mortar the Sun Hive if I installed it on my land as the winter conditions are cold and wet.
Reposted at https://rainwaterrunoff.com/natural-bee-keeping-the-sunhive/
It’s cold and wet here in winter too.
And in summer for that matter!
I overwintered mine by enclosing it in two lifts of a WBC hive and topping it off with the roof. The underneath was protected by the stand. It has come through winter well and the bees are flying strongly now.